When creating a hardware-based product, it is crucial to understand the hardware’s inner workings. This allows you to control project costs, identify potential performance bottlenecks, improve compatibility, and ensure security. By identifying potential hardware issues early in the development process, reverse engineering can significantly reduce the time and resources needed for debugging and troubleshooting, leading to more efficient development cycles and minimized expenses.
Reversing a device can be challenging, especially for teams unfamiliar with the necessary tools and techniques. In this article, Apriorit experts share what hardware reverse engineering entails and how it can benefit you. We also analyze a practical example of reversing a router and extracting its firmware.
This article will be useful for development leaders who work closely with various devices and are looking for ways to ensure a smooth connection between hardware and software.
What is hardware reverse engineering?
Hardware reverse engineering is the process of deconstructing a physical device to understand its design, components, and functionality. This involves disassembling the device to study its components.
A reverse engineer analyzes the device’s circuitry, firmware, and communication protocols. This process involves hardware instruments like oscillographs and device programmers along with software reversing tools like IDA. Reverse engineers document gathered information and use it to research, reconstruct, or simulate the device’s functionality.
Hardware reversing helps bridge the gap between hardware and software, enabling developers to better understand how they interact. This technique is especially useful for projects that work closely with hardware, such as:
- Drivers
- Embedded firmware
- Network management systems
- Device testing
For example, automotive manufacturers use a lot of third-party devices and boards in their systems and use reverse engineering to check that these devices have reliable security and performance.
Development teams can benefit from reverse engineering hardware in the following cases:
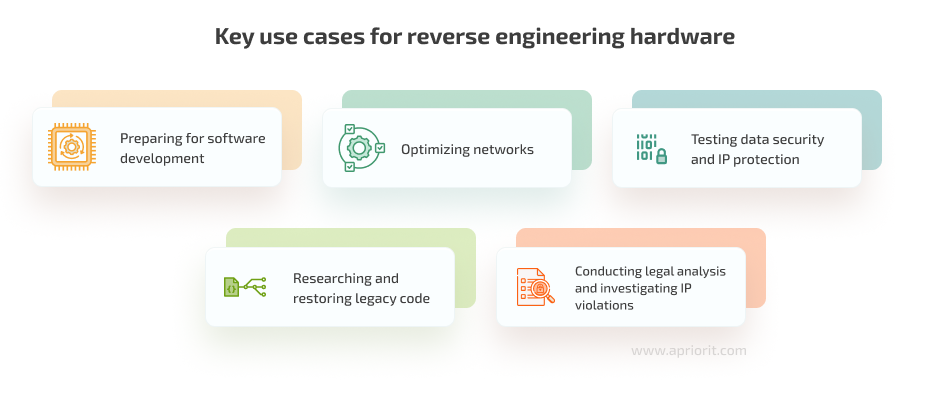
Preparing for software development. Reverse engineering ensures a full understanding of the hardware’s operational mechanisms, constraints, and capabilities. This helps your development team benefit from the hardware’s advantages and mitigate its weaknesses. Deep hardware knowledge also allows you to make more precise development plans and helps prevent issues with compatibility, connectivity, and performance.
Optimizing networks. Networking solutions heavily depend on the hardware connected to the network. Understanding the capabilities and limitations of networking devices can reveal inefficiencies in data handling and processing. Reverse engineering can pinpoint bottlenecks or unnecessary overhead in network infrastructure, providing the necessary insight to optimize software solutions that depend on hardware for faster and more reliable communication.
Testing data security and IP protection. Reverse engineering can identify vulnerabilities in hardware that expose data or intellectual property (IP) to potential threats. Knowledge of hardware reverse engineering tools allows developers to simulate a hacking attempt on their device, understand how a malicious actor can abuse it, and reveal what kind of information could be exposed. After reversing your device, you can implement efficient and relevant security mechanisms. This process is also useful for verifying the security of third-party hardware.
Researching and restoring legacy code. Many older hardware systems are still operational but may lack proper public documentation. Reverse engineering is essential to understanding and maintaining these systems, as well as designing smooth hardware interactions.
Conducting legal analysis and investigating IP violations. Intellectual property violations are often challenging to prove because a company can keep its solution closed or develop a unique design to cover underlying IP theft. By reverse engineering a company’s software and hardware, an independent development team can determine whether patented technologies have been improperly copied or implemented. This information is invaluable in a legal dispute.
Hardware reverse engineering has a variety of applications for any development company that works closely with hardware. Let’s see how you can benefit from this technology and what challenges you should be aware of.
Looking for a way to make your device secure and reliable?
Partner with Apriorit to improve your product’s compatibility, performance, and protection. Entrust your tasks to our experts who have successfully reversed hundreds of devices for the benefit of our clients.
Key benefits and challenges of hardware reversing
Hardware reverse engineering can take your software development to a new level, making it well-planned and focused on competitive features. Depending on your application of hardware reversing, you can experience these key benefits:
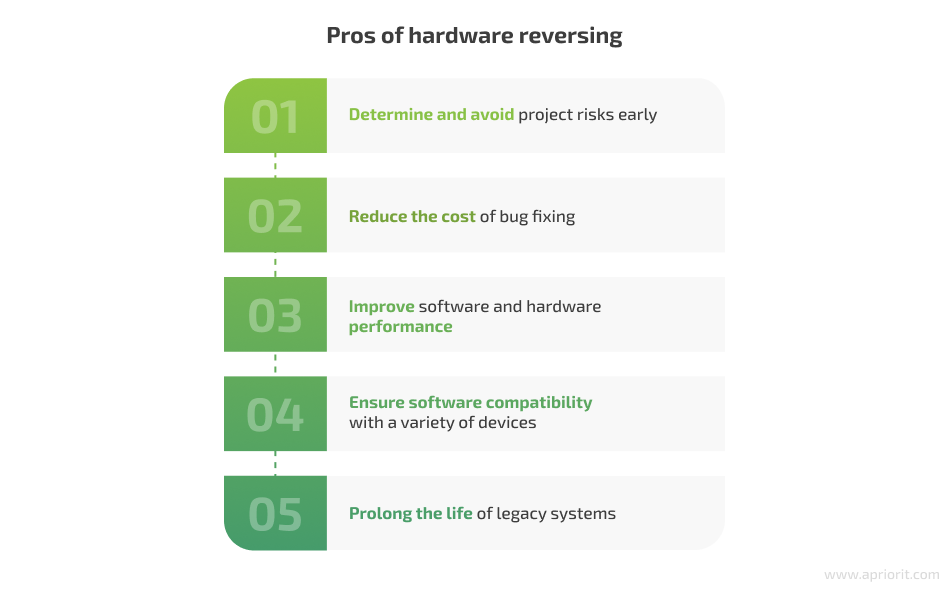
1. Determine and avoid project risks early. By thoroughly understanding the design of hardware and the ways it interacts with software, developers can anticipate possible integration issues, bottlenecks, or vulnerabilities. For instance, reverse engineering an outdated or proprietary device can show whether the hardware poses compatibility challenges or requires specialized software interventions.
Once you’ve researched your hardware with reverse engineering methods, you can start planning software development. New information helps reduce the likelihood of unexpected delays or costs.
2. Reduce the cost of bug fixing. Discovering and fixing hardware-related issues during testing or post-launch is extremely costly and time-consuming. By conducting reverse engineering early, development teams can identify possible issues with device performance and compatibility and plan their software development around them.
Additionally, reversing an early prototype helps your team understand how they can improve hardware before serial manufacturing, saving time and money.
3. Improve software and hardware performance. Understanding the internal workings of the device allows you to fine-tune software for maximum efficiency and mitigate hardware drawbacks. Reverse engineering helps your team analyze how a device processes data, how it transmits signals, and what technical limitations it has. Reverse engineers can discover areas where the hardware can be improved or where software can compensate for hardware limitations.
As a result of reverse engineering, your team will also know when to push software to improve performance and when it isn’t worth the development time because the software has reached device limitations.
4. Ensure software compatibility with a variety of devices. Making your software compatible with many devices is already a challenging task. But it can be almost impossible to work with proprietary and outdated devices without expert reverse engineering. For example, if you are developing a network management system for a client who operates outdated routers and switches, you can buy these devices second-hand, examine how they work, and make sure your code interacts with them properly.
This way, hardware reverse engineering saves time during trial-and-error development and numerous rounds of testing while making your software compatible with target devices.
5. Prolong the life of legacy systems. Many industries continue to rely on legacy hardware systems that may be outdated but are still critical to operations. Reverse engineering allows development teams to maintain, update, or extend the life of these systems without the original design documentation. You can also use reverse engineering results to make new software compatible with legacy devices or develop custom firmware for such devices that introduces new features and security measures.
Extended support for legacy devices can result in significant cost savings, as you can avoid the expense of completely replacing legacy systems with newer alternatives.
Related project
Developing Software for a Drone Battery Charging and Data Management Unit
Explore how we helped a client working on a drone charging solution get positive feedback from their target audience. At their request, we created an MVP consisting of device firmware, cloud infrastructure, and mobile apps.
While hardware reversing promises to optimize software development cost, duration, and success, using this technique without consideration and preparation can backfire. Let’s examine key considerations, limitations, and challenges of reversing a device:
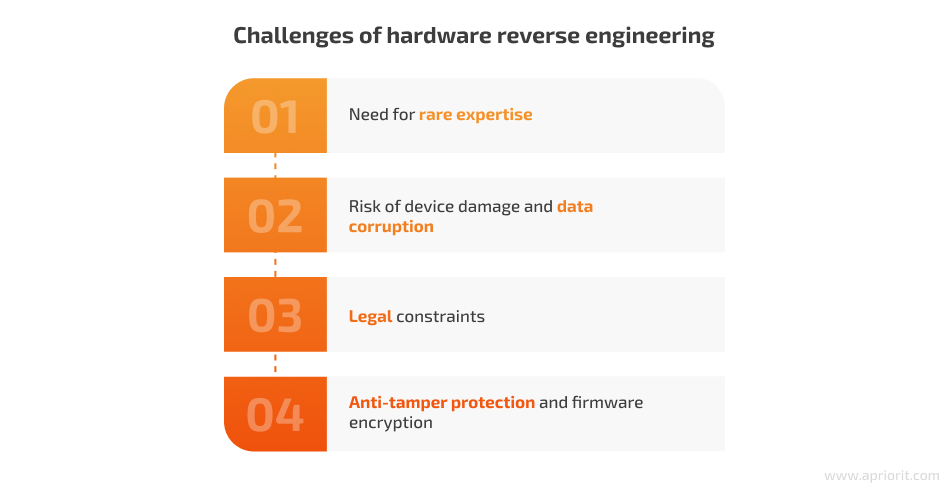
1. Need for rare expertise. Professional reverse engineers spend thousands of hours studying and training. Anyone can open up a device and look inside it, but to analyze how it works, a specialist needs to be able to read circuits, know the marking and purpose of different chips, and understand how signals flow between chips and what data they transmit. They also need software reversing skills to understand the signals and firmware they capture from the board.
Hiring such a specialist is challenging and costly for a company without internal expertise. Also, having a dedicated reverse engineer in-house isn’t always cost-efficient: while they are busy during project research and preparation for development, there isn’t much to do for a reverse engineer in late development stages. That’s why many teams choose to outsource their reversing tasks to companies like Apriorit who specialize in this type of work.
2. Risk of device damage and data corruption. Disassembling and analyzing hardware involves physical manipulation of the device, which can cause irreparable damage. This is especially possible if you work with an inexperienced reverse engineer. On some projects, you can easily replace the board, but not if you are working with a rare legacy device, a custom-built prototype, or a device that stores valuable data.
While it’s impossible to completely eliminate the risk of device damage and data corruption, there are ways to mitigate it:
- Make sure that your reverse engineer has experience working with similar devices
- Provide the reverse engineer with all the tools they need to work with the device in a safe manner
- If possible, purchase or manufacture an additional device to compare it to the reversed one from time to time
3. Legal constraints. Depending on its goal and methods, hardware reverse engineering can be an illegal activity, particularly when it involves proprietary technology or intellectual property protected by laws like Directive 2009/24/EC and the Uniform Trade Secrets Act. Violating them can lead to costly legal disputes and reputational damage.
Generally, hardware reverse engineering is generally legal if you:
- Don’t violate the end user license agreement agreement for the product you reverse
- Don’t publish the results of your research
- Don’t copy patented technologies and solutions
Before reversing something, consult with expert reverse engineers and your legal team to make sure your actions don’t violate the IP of other companies.
4. Anti-tamper protection and firmware encryption. Many device manufacturers design their devices to prevent unauthorized access and protect their sensitive data and IP. Anti-tamper mechanisms often trigger defensive actions, such as erasing or locking sensitive data if the device detects disassembling or modification attempts. Reverse engineers must be extremely careful when dismantling hardware to avoid tripping these protections. In some cases, anti-tamper features are embedded at the chip level, making them nearly impossible to bypass without specialized equipment and expertise.
Working with encrypted firmware requires substantial cryptographic knowledge and resources. Decrypting firmware typically involves brute-forcing the encryption key or finding vulnerabilities in the encryption process.
While such protection mechanisms are designed to prevent malicious activity, they also make legitimate device research more challenging.
As you can see, working with professional reverse engineers can help you avoid most of these limitations and challenges. Reverse engineers at Apriorit have years of experience working with a variety of devices from drone batteries to VR headsets and audio equipment.
In the next section, we share a hardware reverse engineering tutorial for extracting firmware from a sample device. Apriorit engineers often use this process in our projects, and it will be useful for any development team that needs to analyze an unknown device and doesn’t know where to start.
Read also
Evolution of Reverse Engineering: From Manual Reconstruction to Automated Disassembling
Discover the key stages of the software reverse engineering process and tools you can use to automate them.
Reverse engineering a router: step-by-step example
At Apriorit, we often receive requests to research hardware devices. For example, say a client plans to develop a solution that interacts with a device, but there’s no public information about it. Or a client’s task involves modifying a device to suit their needs, yet the operating principles of the device are either undocumented or not publicly accessible.
Let’s start reverse engineering a router with a visual inspection of the device.
1. Inspecting the device
Let’s suppose that a client approaches us with a request to research a TP-LINK TL-WR340GD router. We start by visually examining the device to understand its layout, design, and components.
Here’s the layout of the circuit board:
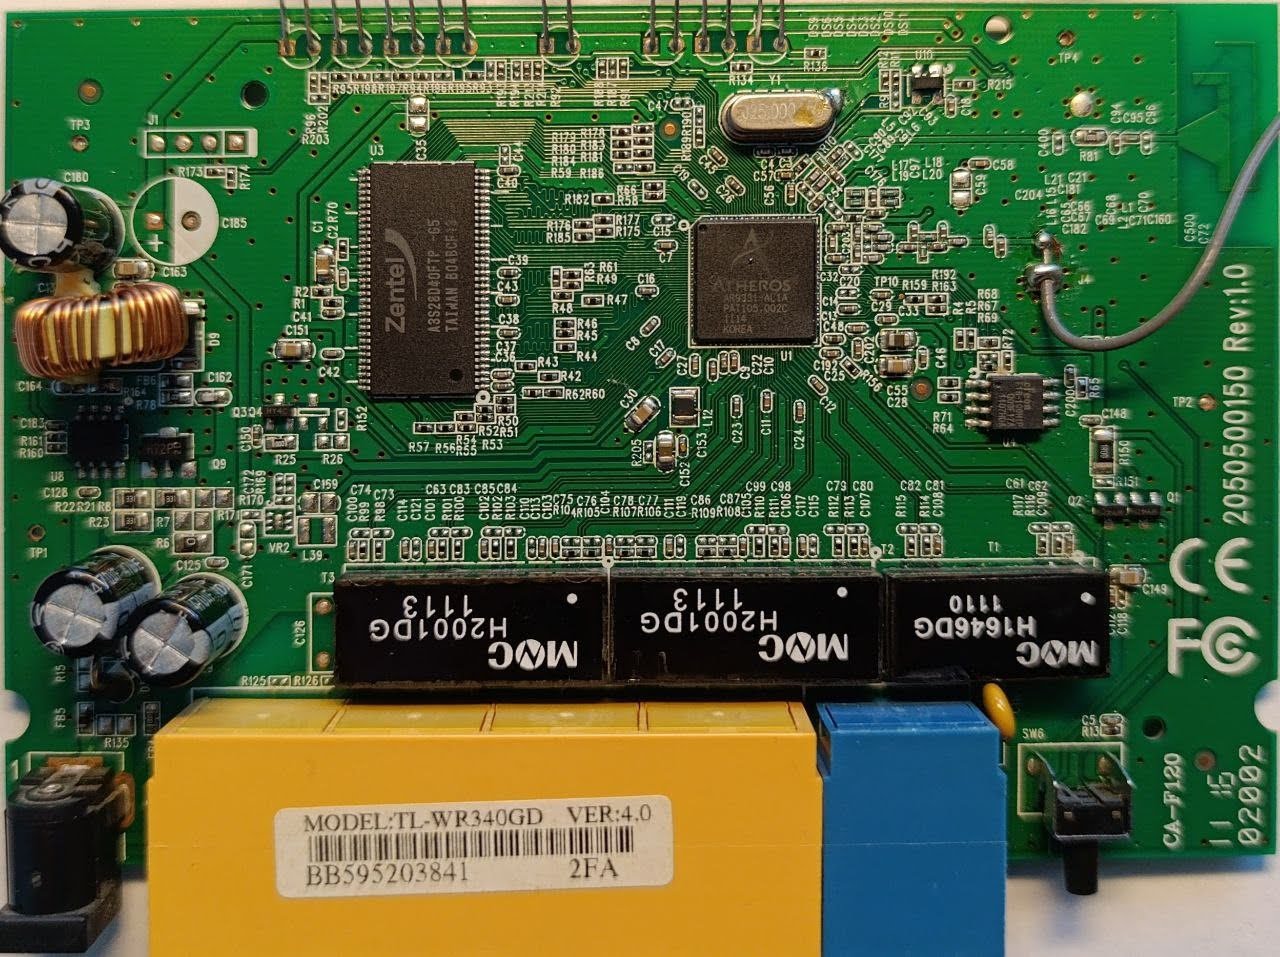
First, we search for the microcontroller, as it is the brain of any modern device that contains its main logic. The “Atheros AR9331-AL1A” marking tells us the model of the microprocessor, and we can find its public documentation. Our focus is on the pins labeled SPI, I2C, or RX/TX, which are responsible for communication with other elements of the board.
Once we locate those pins, we get a multimeter — an electronic device that allows us to measure the properties of simple electronic components such as resistors, transistors, and capacitors. While determining the specific values of components is not often necessary for our task, it does come up occasionally in hardware reversing.
We also frequently test electrical continuity with a multimeter to detect breaks in conductors and identify which pins of different components are connected to each other. To detect breaks, we carefully trace the path from a pin to another component or an output. Using the multimeter in continuity mode and connecting it to two pins, we can ensure that we have correctly traced the path. If there is continuity between pins, the multimeter will beep.
Traces from the SPI pins of the microcontroller lead to the F16-100HIP chip. Note that the trace can pass through test points on the circuit. These are of particular interest to us because they are easier to connect to than the chip’s pins.
Read also
Reverse Engineering IoT Firmware: Where to Start
In this step-by-step guide, Apriorit experts examine the key stages of reversing IoT hardware, necessary preparation steps, and tools and features you’ll need to look inside your device.
2. Capturing device signals
Once we’ve determined which pins the microcontroller uses to exchange signals with other elements on the board, it’s time to figure out what kind of data it is transmitting or receiving. To capture the data traveling along this trace, we solder wires to the test point of interest and use an oscilloscope.
An oscilloscope is a measurement tool that can capture, process, and visualize both digital and analog signals. This device allows us to record analog signals over a set period of time and use this data to determine the operating modes of the analog components on the board.
Let’s connect the oscilloscope to the wires and monitor the signal on its display:
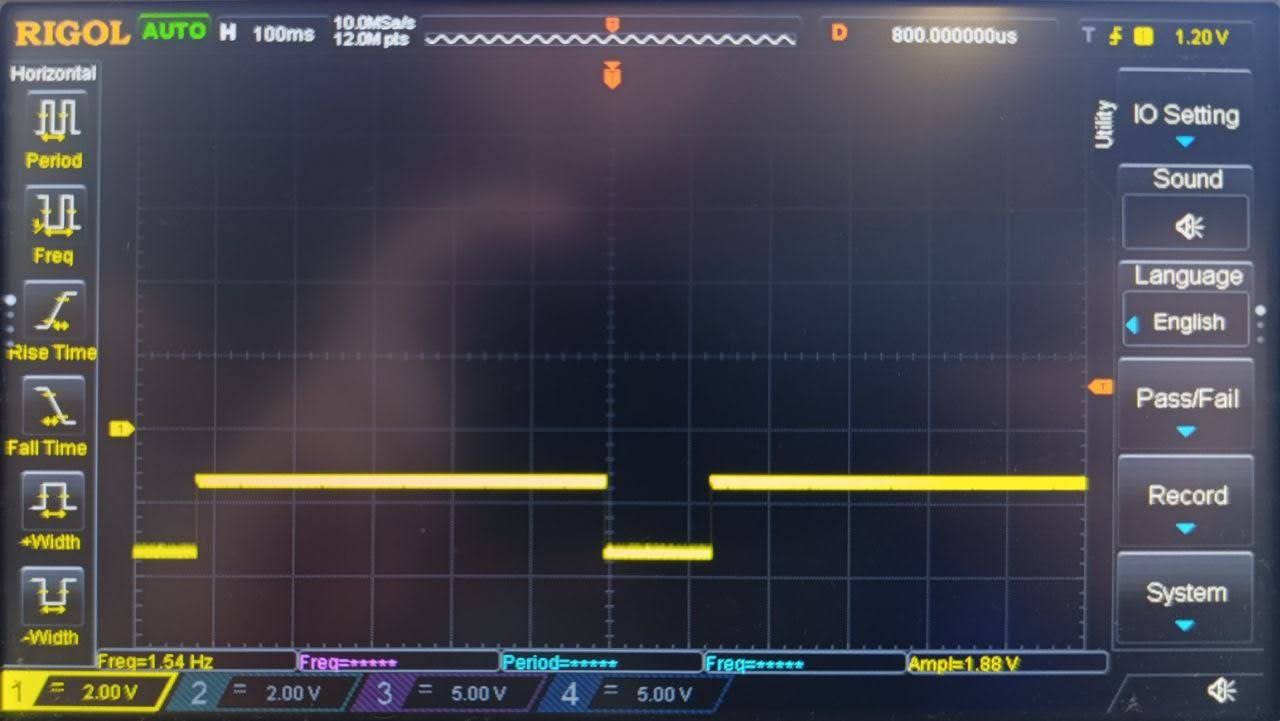
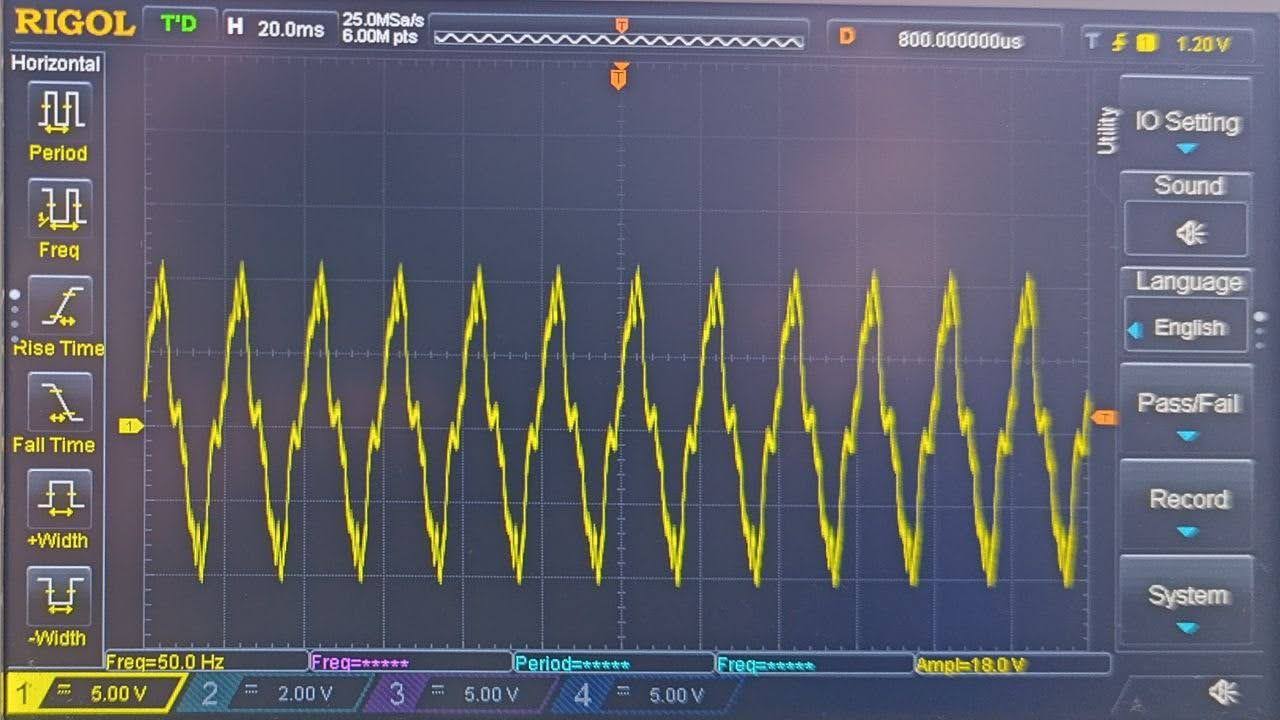
Since the signal changes rapidly between 0 and 2 volts, we can conclude that it’s a digital signal. An analog signal is represented by smooth transitions that frequently reach peak voltage. Here’s how an analog signal would look:
To work with digital signals, let’s use a Saleae Logic analyzer — a hardware and software tool for capturing, analyzing, and logging digital signals. Unlike an oscilloscope, this tool allows us to quickly collect many digital signals over an indefinite period, automatically analyze them, and store the records. At Apriorit, we always use a Saleae Logic analyzer for capturing the traffic exchanged between digital components on a board because it saves reverse engineers a lot of time.
Let’s connect the signal receiver to our test points and start capturing the signals. To determine the function of each pin, we refer to the documentation for the F16-100HIP chip. We’ve already established that this trace is connected to the SPI pins of the microcontroller, so let’s enable the SPI analyzer in the Saleae Logic software and review the data we capture.
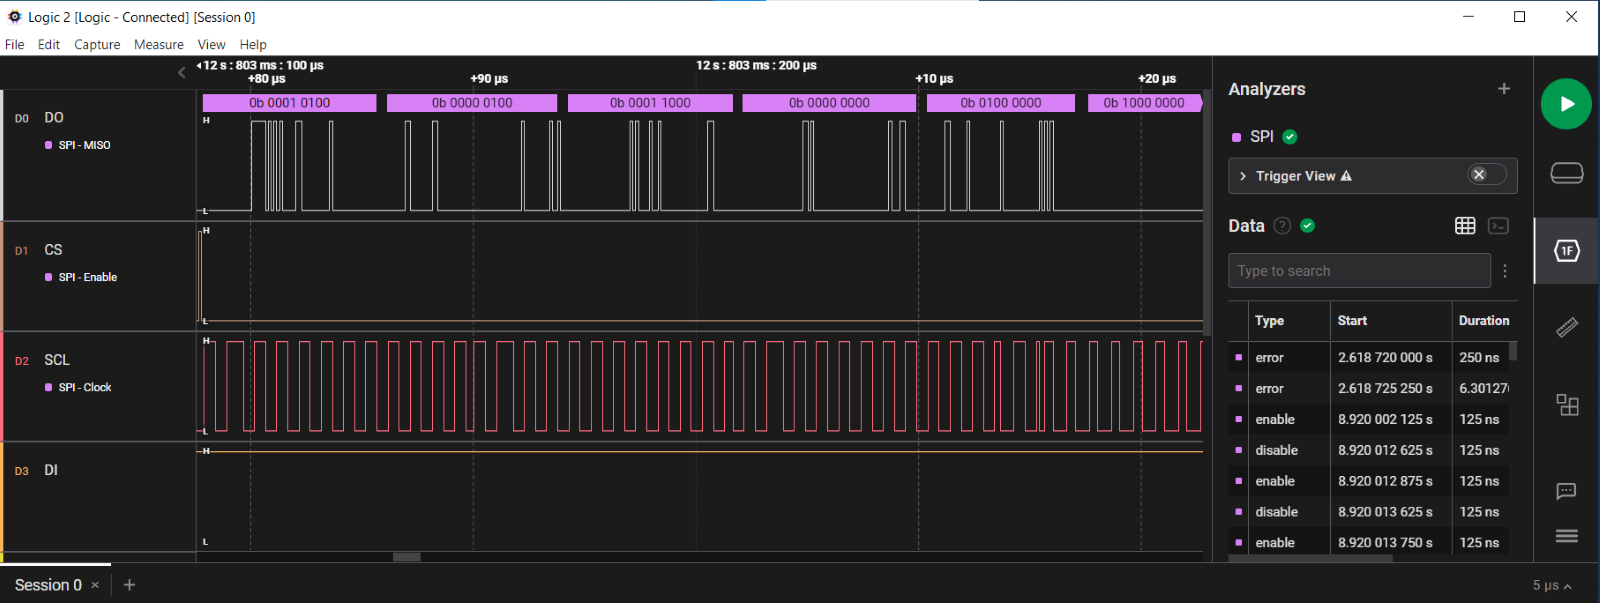
At this stage, we’ve captured traffic from one session of the device’s operation. Next, we need to collect similar sessions and monitor any changes in the traffic. Based on this data, we can create a firmware model that could replace the current microcontroller and potentially expand its functionality in the future.
Using the information we collected, we can develop a proof of concept (PoC) using Arduino boards. Arduino is a simple microcontroller with a built-in bootloader and a modular structure that makes it easy to add custom features such as more memory, Bluetooth, or Wi-Fi. We can make the board reproduce our captured session and add modifications or new logic.
Building a PoC with Arduino is a useful way of researching and testing a small simple solution. Real-life projects often require more powerful hardware because Arduino uses a weak Atmel chip, which has low performance and limited memory.
Read also
Discovering and Mitigating Security Vulnerabilities in Routers: A Practical Guide
Examine the risks of deploying unprotected routers in your network and learn how to prevent them from our best practices and a real-life example.
3. Working with external device memory
Some devices store firmware on a dedicated non-volatile memory chip, or EEPROM, and load it into the microcontroller during startup. For example, motherboards, most modern routers, and car control centers store their BIOS separately from other chips.
We can access firmware stored on an EEPROM using a device programmer, also known as a device burner. This device can upload firmware to and read firmware from a chip.
The method for loading firmware onto the chip is determined by the chip manufacturer, so each chip model typically requires a specific programmer. EEPROM chips mainly come in two revisions, and most burners are compatible with them. We’ll use the CH341 programmer for this example.
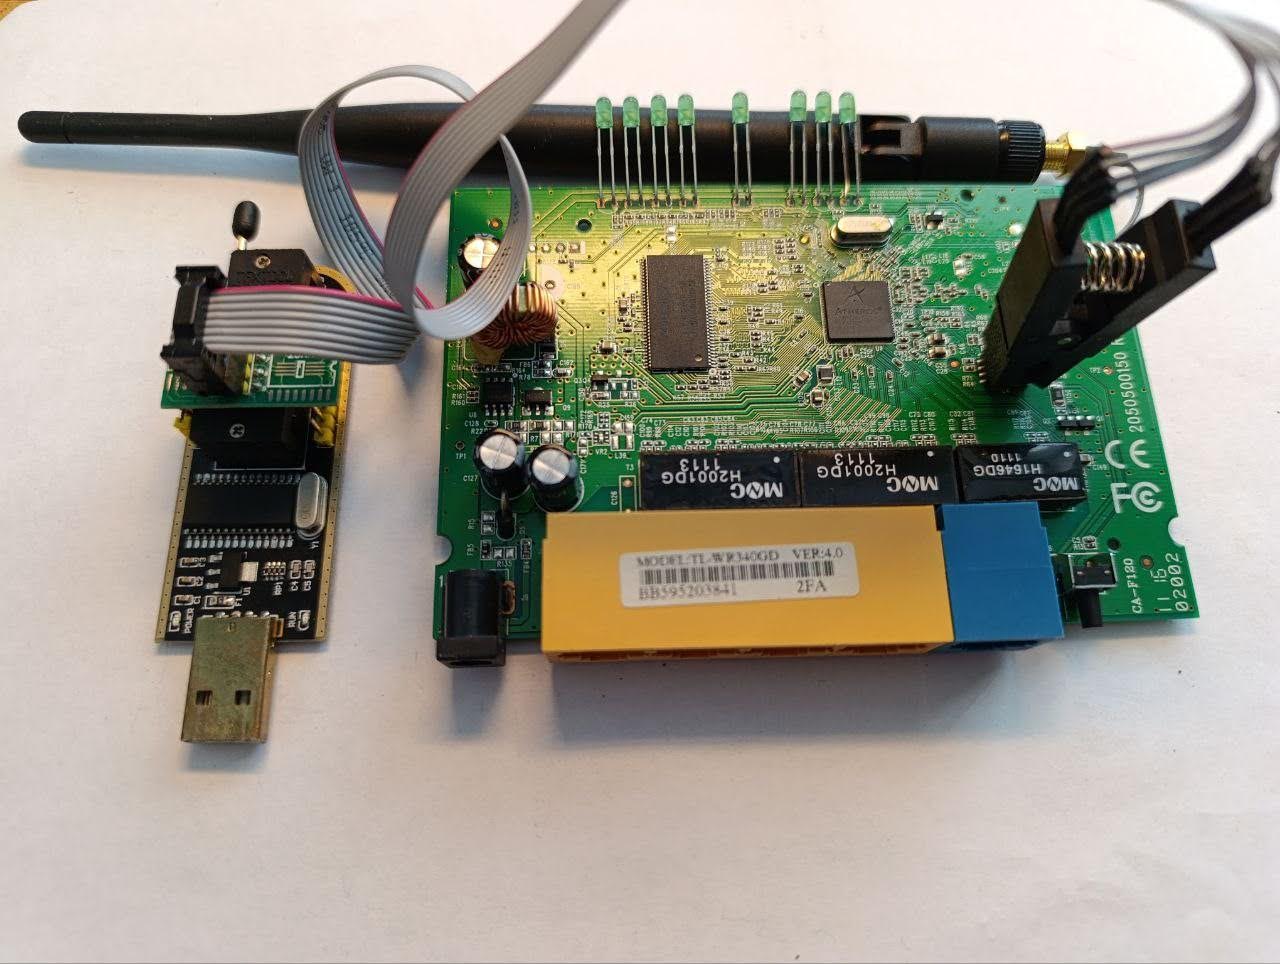
Let’s connect the programmer to the EEPROM chip using a clip and launch the programmer control software.
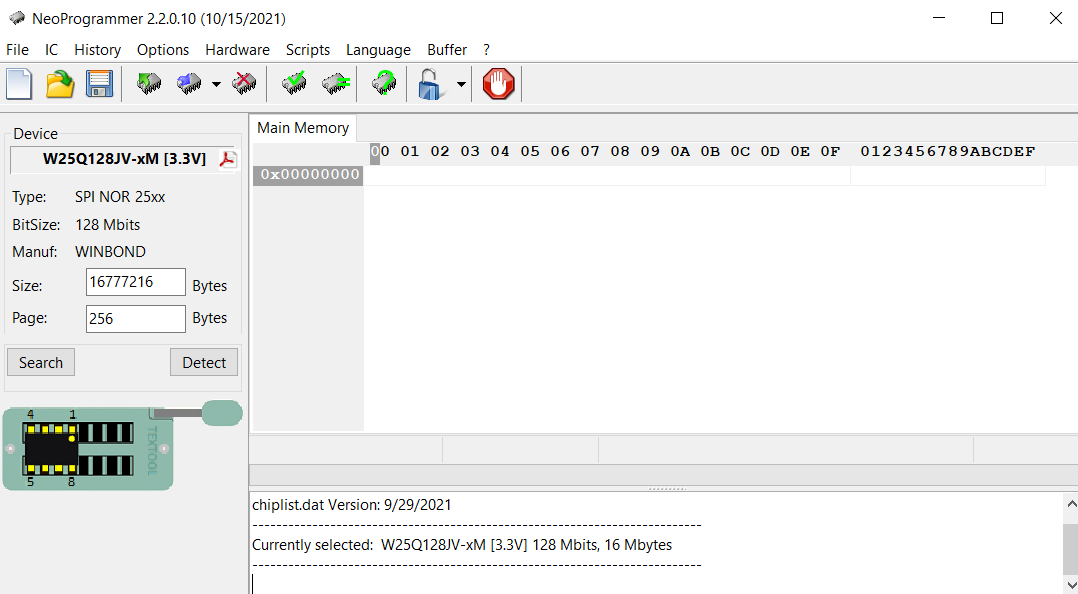
Here, we select the chip model from which we want to extract the firmware. In our case, the EEPROM is marked as “Winbond 25Q128LVSM,” so we choose this chip model. Then, we select Read chip, and the programmer starts reading data stored on the chip.
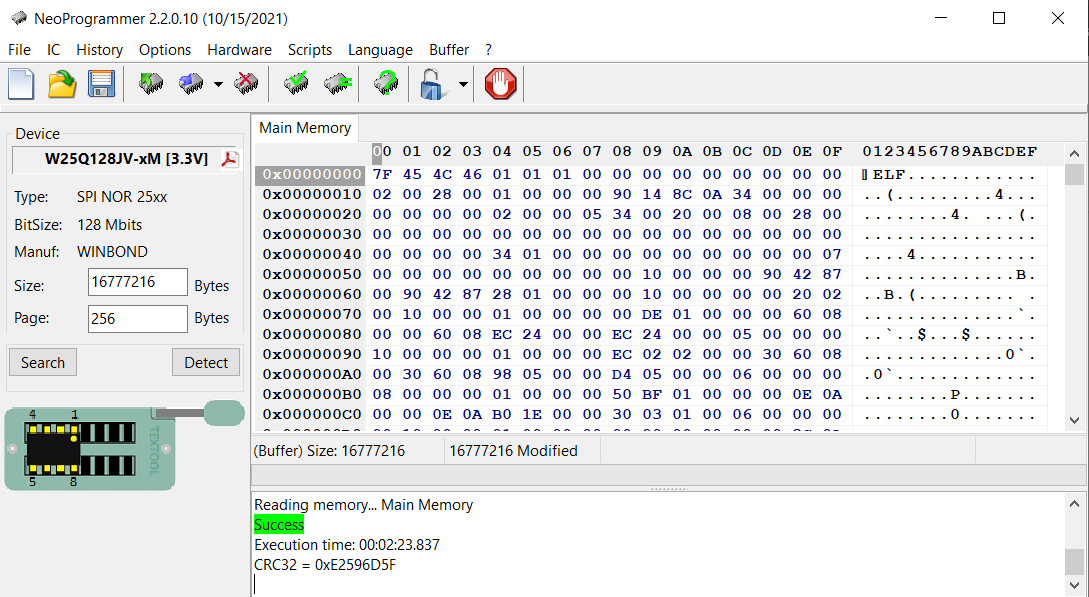
Now we have the binary firmware for this device and can move from hardware to software reversing.
Conclusion
Hardware reverse engineering is an invaluable skill set for any development team that works closely with physical devices. It can help you ensure software and hardware compatibility, test data security, research legacy solutions, and deliver a competitive product. A professional reverse engineer will provide you with actionable insights and help you avoid legal disputes while keeping your device functional after reversing.
At Apriorit, we get many requests to reverse devices. Whether clients need to ensure compatibility with a device, test an engineering sample, or develop custom firmware, our seasoned reverse engineering team with over 20 years of experience is always ready to help.
Want to ensure the perfect match between your hardware and software?
Let’s analyze the strengths, weaknesses, and features of your device to develop perfect software for it.


