Node.js is a powerful technology driving the development of modern scalable microservices, offering a robust solution for many challenges in software architecture development. With its non-blocking event-driven model, Node.js efficiently handles multiple simultaneous connections, making it an ideal choice for building microservices that are both responsive and lightweight.
However, developing microservices with Node.js has its challenges. Developers and software architects often struggle with issues like seamlessly scaling services, effectively handling failures, and integrating new technologies into existing infrastructure.
In this article, we explore key concepts and best practices for developing Node.js microservices and provide a detailed step-by-step implementation guide. Our experts also share common challenges you may encounter during the development process.
This article will be useful for tech leaders looking to enhance their microservices strategies by integrating Node.js into their development processes.
Contents:
The role of Node.js in a microservices architecture
Microservices is an architectural pattern in which an application consists of a collection of loosely coupled, independently deployable services, each designed to perform a specific business function. Because these services operate independently, they enhance the application’s overall scalability and flexibility.
This architectural style allows for improved scalability, maintainability, and flexibility of modern software applications. The ability to independently deploy and scale services makes it easier to manage large codebases, implement new features, fix bugs, and manage user roles, effectively meeting the diverse needs of your clients.
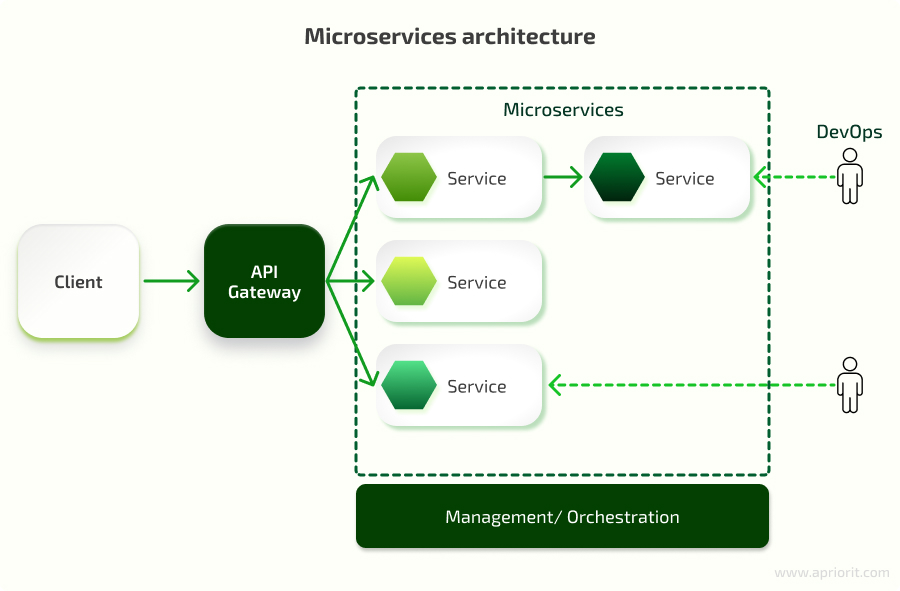
Node.js, a powerful tool for creating server-side cross-platform applications, has emerged as a popular choice for building microservices. Because of its event-driven design, which allows the system to respond to actions as they happen rather than waiting for tasks to complete, Node.js is perfect for handling lots of data at once. It is also well-suited for developing not only traditional websites and backend API services but also scalable and efficient microservices.
The compatibility of Node.js with advanced technologies like gRPC, TypeScript, and serverless architectures allows developers to build modern and adaptable services. The thriving Node.js community also provides extensive resources and frameworks, streamlining the microservices development process.
Elevate your microservices architecture with Apriorit!
Leverage our expertise to create secure, high-performance microservices solutions.
Why choose Node.js for your microservices architecture?
Adopting Node.js for microservices offers significant business advantages, driving both operational efficiency and market competitiveness for your business. Here are key benefits that you can leverage by implementing Node.js microservices:
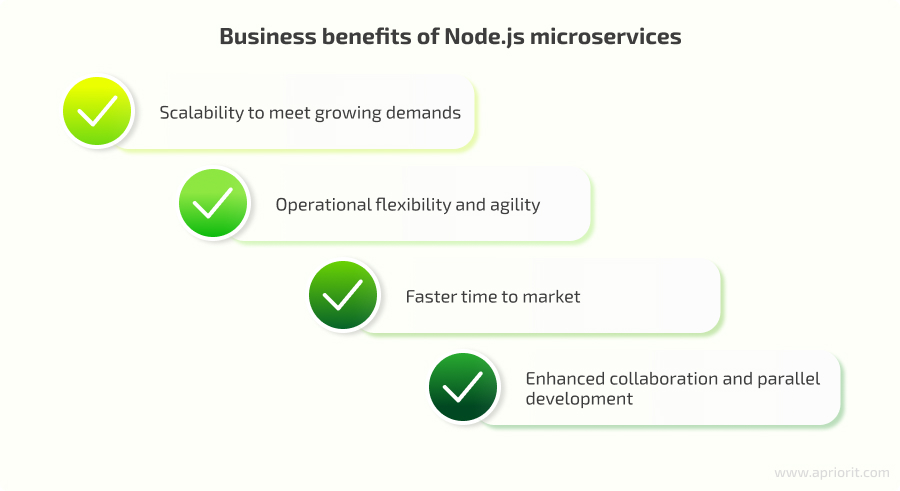
Scalability to meet growing demands. Node.js is powered by the V8 engine, which compiles JavaScript into highly optimized machine code. This engine allows Node.js to execute code at blazing speeds and seamlessly handle increasing numbers of client requests, which means that as your user base expands, your services can scale accordingly without compromising performance. This translates into the ability to support more customers, process more transactions, and deliver a consistently high-quality user experience even during peak use.
Operational flexibility and agility. The modular nature of Node.js microservices allows for unparalleled flexibility in development and deployment. Each microservice can be independently scaled, updated, or replaced without affecting the overall system. Thanks to this flexibility, you can more quickly adapt to market changes, more easily incorporate new technologies, and take a more responsive approach to customer needs.
Faster time to market. The asynchronous, non-blocking architecture of Node.js means it doesn’t wait for tasks like reading files or querying databases to complete before moving to the next operation. Instead, it continues processing other requests while callbacks handle the responses when they’re ready. Combined with access to a vast ecosystem of libraries and tools, Node.js helps development teams work more efficiently and reduce the time required to bring new features or products to market. For businesses, this speed is a competitive advantage, allowing for faster innovation, a quicker response to market trends, and the ability to deliver new services ahead of competitors.
Enhanced collaboration and parallel development. Node.js supports parallel development, which allows different teams to work on separate microservices at the same time. For a company, this means reduced development cycles, better use of development resources, and faster project completion. The ability to develop and deploy services in parallel also improves collaboration across teams, leading to more cohesive and well-integrated products.
Common challenges in Node.js microservices
While Node.js offers many advantages, there are certain challenges to consider when using it for microservices.
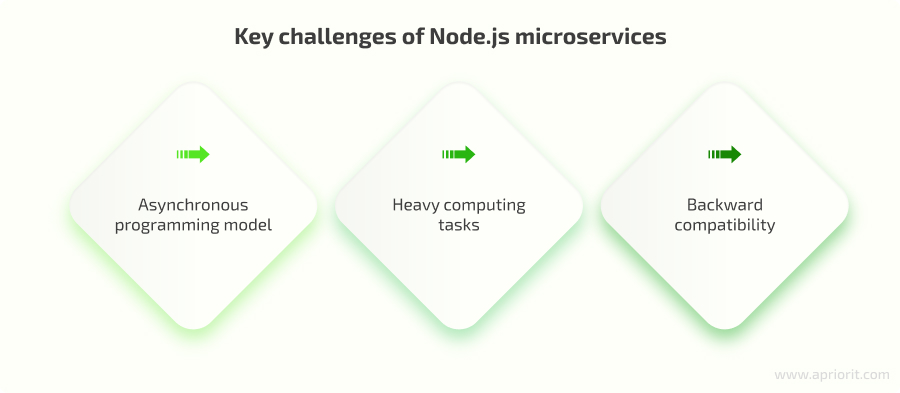
Asynchronous programming model. Although the asynchronous model enables rapid response times, it can lead to complex code that’s harder to maintain, especially when multiple tasks are executed in the background. In this model, tasks such as database queries or file I/O operations don’t stop the program’s execution while waiting for a response. Instead, they run in the background, and once completed, a callback function or promise handles the result.
What can be done?
Developers can use the async/await syntax, which simplifies asynchronous code and improves maintainability.
Heavy computing tasks. Node.js is not ideally suited for CPU-intensive tasks like image processing, video encoding, or machine learning algorithms. Such tasks can monopolize CPU resources, slowing down the event loop.
What can be done?
Developers can offload heavy computations to child processes or worker threads, ensuring that I/O-bound operations remain responsive. Alternatively, these tasks can be handled by specialized microservices or external services.
Backward compatibility. The Node.js API is updated frequently, and not all updates are backward-compatible. Staying up to date with all modifications requires frequent code rewriting.
What can be done?
Developers should employ version pinning and containerization (for example, using Docker) to isolate the environment and safeguard against unexpected API changes. Staying ahead of Node.js updates and thoroughly testing applications will also help them adapt quickly to any changes.
By carefully considering these factors and leveraging the strengths of Node.js, developers can build robust, scalable, and efficient microservices. Now, let’s see how you can introduce Node.js microservices into your system.
Read also
Microservices and Container Security: 11 Best Practices
Securing your microservices and container-based architecture is crucial for building resilient and reliable software. Apriorit experts share their best practices for mitigating risks and improving your product’s security.
How to implement Node.js microservices step by step
If you want to implement microservices in Node.js, you might require a systematic approach, as you need to make sure that each component is correctly set up and integrated for optimal performance. Below is our step-by-step guide to help you navigate the process of setting up and deploying Node.js microservices.
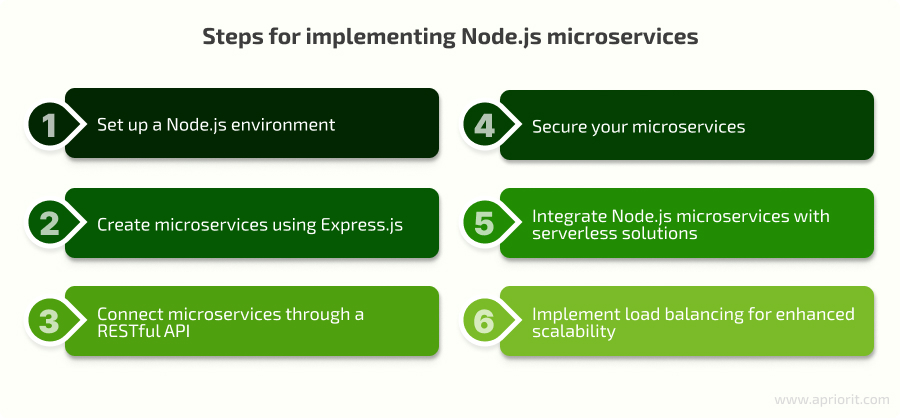
Let’s take a look at each of these steps in detail.
Step 1. Set up a Node.js environment
Before you start the development process, you need to establish a Node.js environment.
- Download and install Node.js. Visit the official Node.js website, download the latest stable version for your operating system, and follow the instructions for installing Node.js.
- Initialize a new project. Run npm init in your project directory and follow the prompts to create a package.json file, which will hold your project’s metadata and dependencies.
Here is how you create a new directory, set it as the current working directory, and initialize a new Node.js project:
mkdir my-microservices-project
cd my-microservices-project
npm init -yThis setup provides a solid foundation for developing and managing your Node.js microservices.
Step 2. Create microservices using Express.js
Express.js is a minimalist and flexible Node.js web application framework that allows you to quickly develop microservices. To illustrate, let’s create two simple microservices: book-service and order-service.
Book-service manages a catalog of books, providing functionalities such as adding new books, updating book details, retrieving book information, and deleting books from the catalog. Here is how you create it:
import express from 'express';

const app = express();
const PORT = process.env.PORT || 3001;

app.get('/books', (req, res) => {
  res.send('List of books from Book Service');
});

app.listen(PORT, () => {
  console.log('Book Service listening on port ${PORT}');
});With the code above, you can implement an API endpoint for retrieving a list of books, making the book-service a RESTful service.Order-service handles the creation, updating, and tracking of customer book orders. It interacts with book-service to ensure that orders are placed only for available books and manages the entire lifecycle of an order from placement to completion. Here is how you can set it up:
import express from 'express';

const app = express();
const PORT = process.env.PORT || 3002;

app.get('/orders', (req, res) => {
  res.send('List of orders from Order Service');
});

app.listen(PORT, () => {
  console.log('Order Service listening on port ${PORT}');
});This order-service will communicate with other services, such as book-service, to fulfill orders.
Service discovery allows microservices to automatically locate and communicate with each other within a network. This mechanism eliminates the need for services to store each other’s URLs or IP addresses, simplifying management and enhancing the decoupling of services within the same environment.
In the code below, we show how to set up a service registration and health check implementation using Consul, which helps in the service discovery process within a microservices architecture.
import consul from 'consul';

const consulClient = consul();

// Register service
consulClient.agent.service.register({
  name: 'book-service',
  id: 'book-service-1',
  port: 3004,
}, (err) => {
  if (err) throw err;
});

// Service discovery
consulClient.health.service({ service: 'book-service', passing: true }, (err, result) => {
  if (err) throw err;
  const service = result[0].Service;
  console.log('Service at $(service.Address):$(service.Port)');
});This code demonstrates how to register a service with Consul and then discover it using the service discovery feature.
Book and order services can be developed independently, each residing in its own directory with its own server, which makes them easy to manage and deploy.
Step 3. Connect microservices through a RESTful API
Microservices often communicate with each other using RESTful APIs. This allows them to exchange data and perform tasks in a standardized and scalable manner. In the example below, we show how order-service can leverage a RESTful API to communicate with book-service to function and retrieve data.
import express from 'express';
import axios from 'axios';

const app = express();
const PORT = process.env.PORT || 3002;

app.get('/orders', async (req, res) => {
  try {
    const booksResponse = await axios.get('http://localhost:3001/books');
    res.send('Orders with books: ${booksResponse.data}');
  } catch (error) {
    console.error('Error fetching books: ${error.message}');
    res.status(500).send('Error fetching books');
  }
});

app.listen(PORT, () => {
  console.log('Order Service listening on port ${PORT}');
});Essentially, order-service will fetch a list of books from book-service through a RESTful API call using Axios.
Step 4. Secure your microservices
Security is a critical aspect of a microservices architecture. Implementing appropriate security measures like authentication, authorization, and encryption can help protect your microservices from unauthorized access and data breaches. For example, you can use JSON Web Tokens (JWT) for securing microservices.
Here is an example of implementing JWT authentication into a microservice to ensure secure access to API endpoints:
import express from 'express';
import jwt from 'jsonwebtoken';

const app = express();
const PORT = process.env.PORT || 3003;

app.use((req, res, next) => {
  const token = req.headers['authorization'].split(' ')[1];

  if (!token) return res.status(403).send('Access denied');

  try {
    const verified = jwt.verify(token, 'your_jwt_secret_key');
    req.user = verified;
    next();
  } catch (error) {
    res.status(400).send('Invalid token');
  }
});

app.get('/secure-data', (req, res) => {
  res.send('Sensitive data from Secure Service');
});

app.listen(PORT, () => {
  console.log('Secure Service listening on port ${PORT}');
});With this code, your microservices will be protected against outside attacks.
Read also
Reverse Engineering an API: Business Benefits, Use Cases, and Best Practices
By understanding API functionalities more deeply, you can unlock hidden features, create custom solutions, and bolster your product’s security. Learn how to reverse engineer an API that doesn’t have sufficient documentation or source code access.

Step 5. Integrate Node.js microservices with serverless solutions
Serverless computing platforms offer a convenient way to deploy and manage microservices without the overhead of managing servers. As you integrate Node.js microservices with serverless solutions, you can leverage the benefits of this framework.
A serverless architecture allows you to combine both microservices and full-stack applications without worrying about server setup, maintenance, or configuration.
Here is how you can integrate microservices into a serverless solution:
- Choose a serverless platform like AWS Lambda, Azure Functions, or Google Cloud Functions.
- Define Node.js functions that represent your microservices. These functions can be triggered by events such as HTTP requests or messages from other services.
- Configure an API gateway to route incoming requests to the appropriate serverless functions.
- Implement patterns like Saga or Choreography to coordinate interactions between multiple microservices.
An API gateway acts as a reverse proxy, providing a single entry point for all external requests to a microservices architecture. It abstracts the complexity of underlying services, providing a unified interface for clients.
The API gateway can handle tasks such as request routing, protocol transformation, data aggregation, and shared logic like authentication and rate limiting, acting as the entry point to the microservices ecosystem.
Here is how you set up a simple API gateway using Express and http-proxy middleware.
import express from 'express';
import httpProxy from 'http-proxy';


const app = express();
const apiProxy = httpProxy.createProxyServer();


app.all('/orders/*', (req, res) => {
  apiProxy.web(req, res, { target: 'http://localhost:3001' });
});


app.all('/inventory/*', (req, res) => {
  apiProxy.web(req, res, { target: 'http://localhost:3002' });
});


app.all('/users/*', (req, res) => {
  apiProxy.web(req, res, { target: 'http://localhost:3003' });
});


app.listen(3000, () => {
  console.log('API Gateway on port 3000');
});This code creates an API gateway that routes incoming requests to different microservices based on a request’s URL path.
Step 6. Improve microservices scalability with load balancing
To ensure your Node.js microservices can handle growth and maintain performance, integrating a load balancing mechanism is crucial. This way, they can effectively manage increased loads and maintain a seamless user experience during peak demand.
Here’s how you can implement load balancing effectively:
- Select a load balancer. Choose a load balancing tool that suits your architecture and requirements. Options include software-based load balancers like ngnix and HAProxy, or cloud-native load balancers provided by cloud platforms.
- Configure load balancing rules. Define rules to distribute traffic based on factors such as URL paths, request headers, or health checks.
- Implement health checks. Monitor the health of your microservices and configure the load balancer to redirect traffic away from unhealthy instances.
- Monitor and optimize. Continuously monitor your load balancer’s performance and adjust its configuration as needed to ensure optimal traffic distribution.
Now that you have a solid foundation for implementing Node.js microservices, let’s explore best practices for ensuring your microservices architecture can meet the demands of modern applications.
Related project
Building a Microservices SaaS Solution for Property Management
Explore our success story of redesigning a client’s monolithic Ruby-based platform into a modern microservices-based solution. This transition improved platform scalability, simplified feature implementation, and enhanced the user experience while driving business growth.
Best practices for developing Node.js microservices from Apriorit experts
Building microservices with Node.js requires careful consideration of various factors to ensure their reliability, scalability, and maintainability. By following established best practices, you can create an architecture that is resilient to failure, performs efficiently, and is easy to manage.
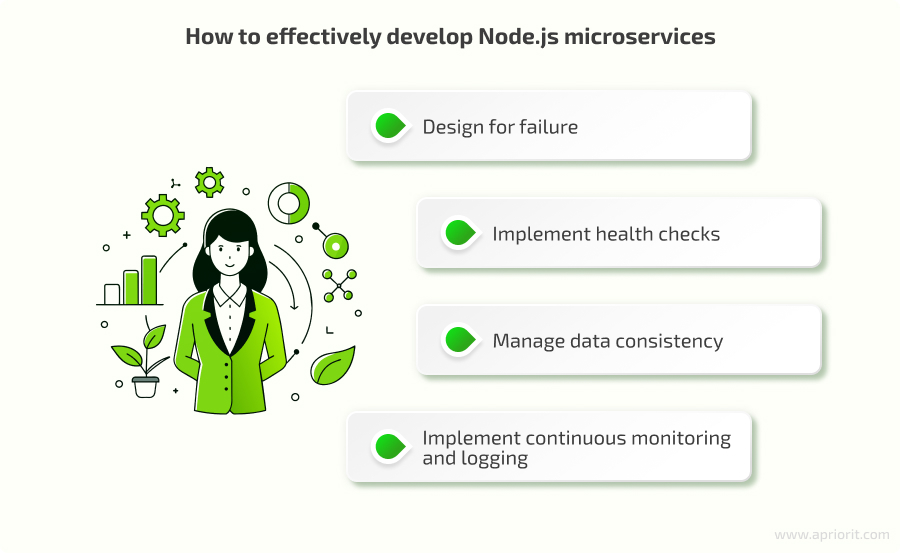
Design for failure
In a microservices architecture, where components are distributed and can fail independently, it’s essential to adopt a design for failure approach. This means anticipating potential failures and implementing strategies to mitigate their impact, such as circuit breakers.
The circuit breaker pattern is a design principle that helps prevent cascading failures in microservices architectures. Acting as an intermediary between microservices, the circuit breaker monitors the health of services and controls the flow of requests based on their status. It operates in three states — closed, open, and half-open — depending on the success or failure of service interactions. When a service fails, the circuit breaker transitions to an open state, temporarily halting requests to prevent further strain on the failing service.
Circuit breaker patterns can:
- Prevent system overload and ensure quick recovery from failures
- Act as a proxy between services, monitoring their health and preventing cascading failures by limiting the number of requests
- Improve system resilience and prevent a single service failure from bringing down the entire system
Below is an example of how you can use the circuit breaker pattern to prevent a microservice from repeatedly trying to execute a function that is likely to fail. We’ll use the Node.js opossum package:
import CircuitBreaker from 'opossum';

const unreliableFunction = () => {
  return new Promise((resolve, reject) => {
    Math.random() < 0.5 ? resolve('Success!') : reject(new Error('Failure'));
  });
};

const options = {
  errorThresholdPercentage: 50,
  timeout: 3000,
  resetTimeout: 30000
};

const breaker = new CircuitBreaker(unreliableFunction, options);

breaker.fallback(() => 'Fallback response');
breaker.on('failure', err => console.error('Action failed:', err.message));

// Usage
breaker.fire().then(console.log).catch(console.error);The unreliableFunction is a simulated function that randomly succeeds or fails. The CircuitBreaker instance is configured with options for error threshold, timeout, and reset timeout. If the function fails too many times within the specified timeout, the circuit breaker will open, and subsequent calls will be rejected with a fallback response. When the reset timeout expires, the circuit breaker will half-open, allowing a single attempt to see if the original function has recovered.
Implement health checks
Health checks are essential for maintaining the reliability and stability of microservices. These checks provide real-time insights into the health status of each service, allowing for proactive issue detection and resolution. There are several types of health checks:
- Liveness checks verify if a service is alive and responding to requests
- Readiness checks determine if a service is ready to handle requests
- Custom checks define specific health checks tailored to your service’s requirements
The code below is designed for a health check endpoint in a microservice, providing status information on service uptime and memory use. Other microservices or monitoring tools can use this health check endpoint to determine the health and performance of other services.
import express from 'express';

const app = express();
const PORT = process.env.PORT || 3004;

app.get('/health', (req, res) => {
  res.send({
    status: 'UP',
    uptime: process.uptime(),
    memoryUsage: process.memoryUsage()
  });
});

app.listen(PORT, () => {
  console.log('Health Check listening on port ${PORT}');
});Regular health checks can help ensure that only healthy services handle requests, thus maintaining the system’s overall robustness.
Manage data consistency
Because of their decentralized data structure, managing data consistency is one of the most challenging aspects of microservices. Each microservice typically manages its own data, which can lead to potential issues if not handled carefully, including:
- Data inconsistencies
- Distributed transaction failures
- Data duplication and redundancy
- Increased testing and debugging complexity
A well-defined strategy for data consistency, like the Saga pattern or event sourcing, can address this issue.
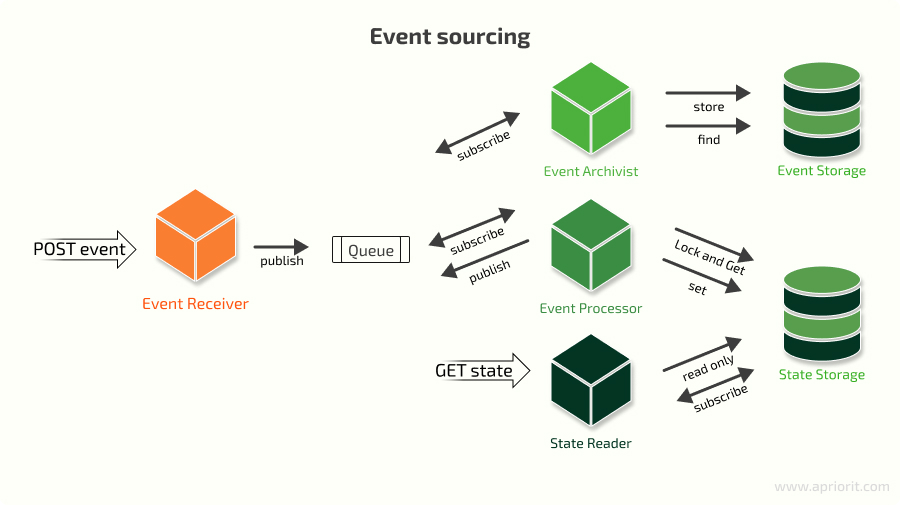
Event sourcing helps you capture all changes to an application’s state as a sequence of events. This allows you to reconstruct the system’s state at any point in time and ensure consistent performance.
The Saga pattern helps you break down a long-running transaction into a series of local transactions, each managed by a Saga orchestrator. This pattern ensures that the transaction is either fully completed or rolled back in case of failures.
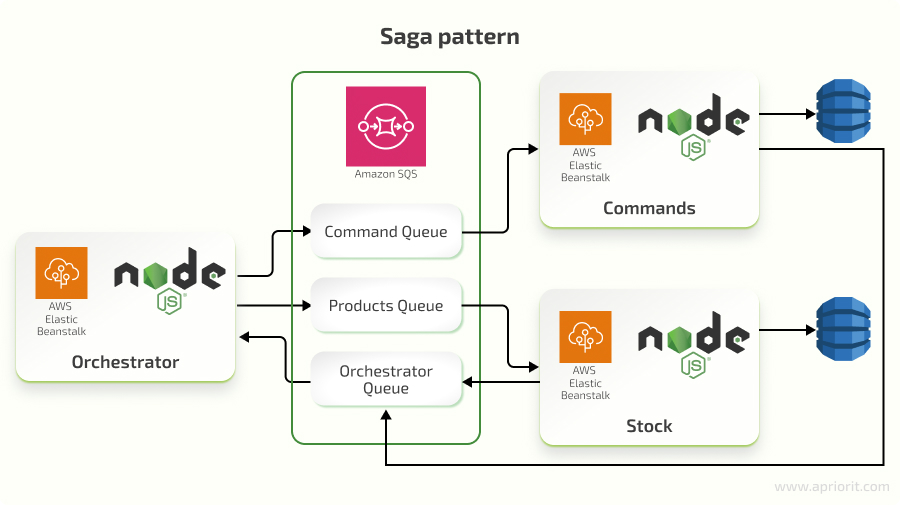
Event sourcing is ideal for tracking the history of state changes and enabling replayability. The Saga pattern is suitable for managing complex transactions that span multiple services. Combining event sourcing with the Saga pattern can work out really well. Event sourcing lays down a detailed record of events that the Saga pattern can tap into, managing those tricky transactions and making sure you can undo or adjust actions if something goes wrong. Together, these patterns can maintain data accuracy and consistency across your distributed system.
Read also
Building a Microservices Architecture Using Azure Service Fabric
Considering migrating your software to a microservices architecture? Use our practical step-by-step guide on building a microservices architecture and deploying a .NET application to Azure Service Fabric.

Implement continuous monitoring and logging
This approach helps you diagnose issues and understand the behavior of microservices in production environments. Centralized logging and monitoring solutions can give you deep insights into the system’s health and performance. There are several popular monitoring tools you can use:
- Winston is a versatile logging library for Node.js applications that supports custom logging levels and multiple transports. You can direct logs to various outputs such as a console, file system, or remote logging service. Winston is suitable for production environments, facilitating centralized log management.
- Prometheus is a powerful monitoring tool that specializes in metric collection and monitoring. It is particularly effective for tracking time-series data, such as request rates and system resource use. You can also use it for observing the health and performance of microservices.
- Grafana is a data visualization tool that provides real-time insights and alerts. It’s often paired with Prometheus, and together they allow you to create detailed dashboards to monitor the operational state of your microservices ecosystem, making it easier to proactively detect and address issues.
- Elastic Stack is a popular log visualization solution that includes Elasticsearch, Logstash, and Kibana. It is excellent for managing and analyzing large volumes of log data, and its rich visualizations and search capabilities can help you gain deep insights into your system’s health.
- Datadog and New Relic are two powerful observability platforms that provide extensive monitoring and analytics capabilities. They are particularly well-suited for cloud-native applications. These tools offer end-to-end visibility into your application’s performance, allowing you to monitor servers, databases, tools, and services through a unified interface.
Let’s see how you can perform logging with the help of Winston:
import winston from 'winston';

const logger = winston.createLogger({
  level: 'info',
  format: winston.format.json(),
  defaultMeta: { service: 'user-service' },
  transports: [
    new winston.transports.File({ filename: 'error.log', level: 'error' }),
    new winston.transports.File({ filename: 'combined.log' }),
  ],
});

// Usage
logger.info('Information message');
logger.error('Error message');With the help of this code, you can configure Winston to log information like errors, warnings, and debug data at various levels, helping with debugging and monitoring.
While following best practices is crucial for the successful development of Node.js microservices, it’s equally important to be prepared for the challenges you can encounter during the process. Let’s see how we can help you overcome these obstacles and create a robust and scalable microservices architecture.
Read also
11 Best Practices for Securing a Web Server Based on Node.js Express
Protect your business from cyber threats and ensure the safety of your users’ data. Apriorit experts share their best practices to enhance the security of web products built with Node.js Express.

How can Apriorit help with microservices development?
At Apriorit, we understand the challenges of microservices architecture and have perfected our expertise to effectively address them. Our dedicated team can help you receive a solution without any issues. Here is what you will get with us:
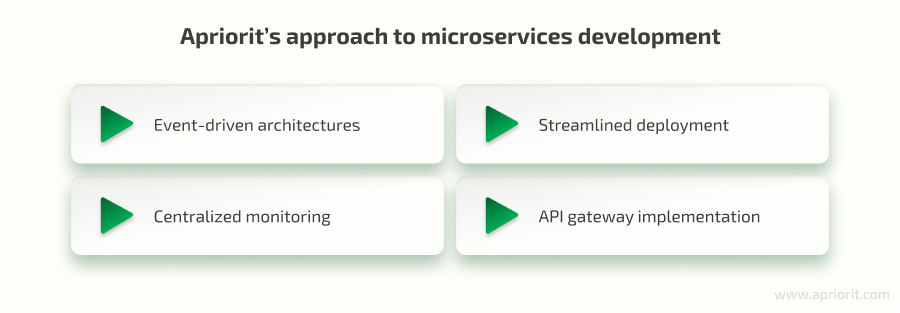
Event-driven architectures. We specialize in designing and implementing event-driven systems, making sure that your services communicate seamlessly and maintaining data integrity without tight coupling.
Streamlined deployment. Our team leverages tools like Docker and Kubernetes to containerize your microservices, automating their deployment and scaling. This allows you to have a more efficient, reliable, and scalable software solution that can easily adapt to changing demands.
Centralized monitoring. Our specialists can perform comprehensive monitoring to gain visibility into your microservices’ health and performance. We use industry-leading tools to proactively identify and diagnose issues.
API gateway implementation. Our experts can design and implement robust API gateways to act as a single entry point for your microservices, providing security, load balancing, and rate limiting.
We work closely with you to understand your specific needs and tailor our approach accordingly, ensuring that the solutions you receive align with your business objectives.
Conclusion
Building microservices in Node.js is possible because of its efficiency and rich ecosystem, which provides a strong foundation for building microservices solutions. With the help of this guide, you can effectively create, deploy, and manage microservices that are scalable, resilient, and secure.
However, Node.js development comes with its challenges, especially since the field of microservices continues to evolve. By staying informed about these challenges, you can leverage the full potential of Node.js and create cutting-edge microservices architectures. An expert dedicated team can help you navigate any potential challenges and adapt your strategies accordingly.
Unlock the full potential of microservices
Partner with us to navigate the complexities of this powerful architecture!


