Skip to main content


By integrating your web applications with cloud services, your business can significantly enhance the scalability and security of your solutions. Leveraging the benefits of cloud computing technologies will allow you to stay competitive in the digital world.
However, integrating with cloud platforms can be tricky. Although cloud service providers offer user-friendly interfaces and informative manuals, there are still some configuration tips and tricks your developers must be aware of. Poorly configured or misconfigured cloud environments not only can cause you to miss scalability opportunities but might even lead to security risks, such as unauthorized access to sensitive data and legacy accounts. Understanding how to leverage the unique features and tools of cloud services will let you improve the security of your solution.
This article offers valuable insights on integrating Node.js applications with three cloud platforms: Amazon Web Services (AWS), Microsoft Azure (Azure), and Google Cloud Platform (GCP). We also explore practical examples of how to check that cloud environments are configured securely and efficiently.
All examples are based on real-life situations in which Apriorit engineers have helped our clients integrate their applications with cloud ecosystems for better scalability, reliability, and innovation.
This article will be useful for software project leaders looking for proven ways of integrating Node.js applications with cloud services.
Business benefits of integrating cloud services
Integrating with cloud services can help you extend the capabilities of your web application and ensure its high availability, scalability, and security. A unified, efficient, and flexible cloud environment can eliminate the need for infrastructure investment and additional IT resources, saving costs in the long run. Thus, your team can build and maintain a solution that is responsive to frequently changing business needs.
The key business benefits of cloud services integration include:
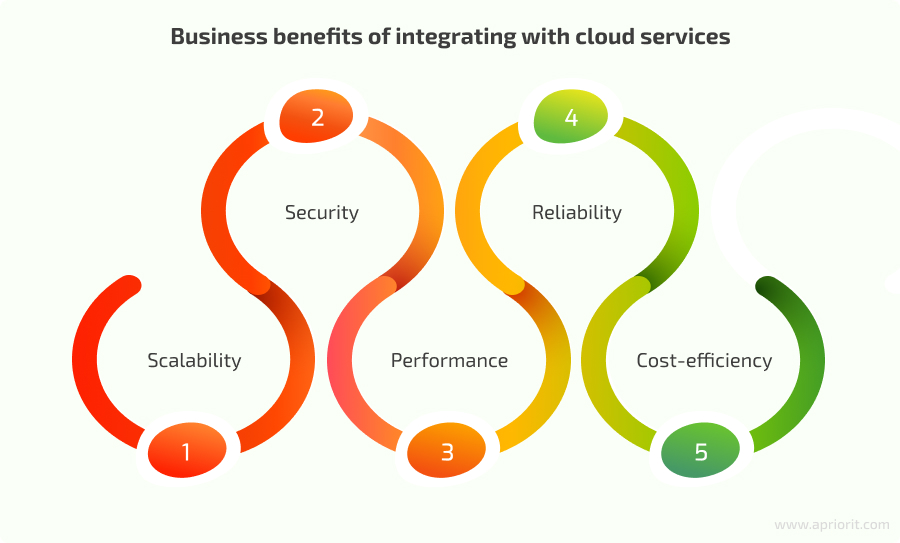
- Scalability — Cloud solutions, such as serverless architectures, allow for smoothly adapting to traffic spikes and scaling resources according to your needs.
- Security — Advanced security measures and regular security updates offered by cloud providers help your team to keep your web solution safe from threats and vulnerabilities.
- Performance — Employing load balancing and auto scaling technologies allows your team to optimize performance and smoothly handle traffic peaks.
- Reliability — Leveraging multiple data centers in diverse locations ensures high availability of your solution, while regular backups guarantee the safety of your data.
- Cost-efficiency — By using cloud infrastructure and paying only for consumed resources, you can significantly reduce costs in the long run.
Knowing what benefits you can get, let’s explore how to integrate applications with cloud environments using practical knowledge Apriorit has gained working on real-life projects.
Looking to level up your Node.js application?
Extend your project’s capabilities and improve its competitiveness by leveraging cloud services! Entrust integration challenges to Apriorit’s experienced and skilled developers.
Choosing technologies for cloud integration
The technology stack must be carefully picked by developers for each project according to its requirements and goals. Let’s explore a real-life example of picking technologies based on project needs.
One of our clients needed to enhance a Node.js solution with cloud-based security. Our team had to resolve a scope of issues, including:
- Problems with monitoring files in storage, including monitoring permissions, downloads of files, and modifications to files.
- Problems with incorrect configuration of AWS, Azure, and GCP business accounts that could cause unauthorized access to sensitive data.
Cloud integration allows you to ensure user access control and to discover vulnerabilities of buckets, EC2 virtual machines, and other cloud services.
To achieve these goals, we used the following technology stack:
- Node.js (Express)
- npm
- SQL
- Amazon DynamoDB
- AWS Systems Manager (AWS SSM)
Node.js allows for improving the speed of development and processing a large number of simultaneous requests without thread blocking. It also has a huge number of third-party modules and libraries that are accessible through the npm package manager. JavaScript allows us to use the same code both on the client and server side, which simplifies development and debugging.
To successfully integrate our Node.js application, we leveraged our software developers’ knowledge of relevant documentation, software development toolkits (SDKs), and application programming interfaces (APIs). SDKs and APIs allowed us to establish access to features such as management of virtual machine instances, data storage and processing, and application deployment.
Now, let’s look at practical examples of integrating Node.js applications. Each example describes key points of integration with AWS, Azure, and GCP cloud services. In addition, we’ll explore diverse examples of leveraging the unique features of each cloud platform to demonstrate how you can use them to enhance your solution’s security.
Read also
The Ultimate Guide to Cloud-based Application Development
Deliver a competitive and efficient cloud-based application! Apriorit experts share valuable insights into what nuances to expect, what skills to look for in your development team, and what workflow to implement.

AWS integration for Node.js applications
To integrate Node.js applications with AWS, your developers first need to get account credentials to access AWS API: YOUR_ACCESS_KEY_ID and YOUR_SECRET_ACCESS_KEY.
To get access credentials for the AWS API:
- Register on the AWS website as a root user to create an AWS account.
- Sign in to AWS Management Console using your account credentials.
- Navigate to AWS Identity and Access Management (IAM) to manage users and accounts.
- In IAM, as a root user, create a new user with access to the Amazon API. Once the user is created, specify the username and select access options.
- Next, generate user access keys:
- In the user’s settings, click Create access key.
- Select Command Line Interface (CLI) as the access method to generate the Access key and Secret access key. Keep these credentials in a safe place, since they will be used for authentication while accessing the Amazon API.
After completing the above steps, developers can proceed to integrating the application with the cloud. First, they need to install the npm package:
npm install aws-sdk Make sure to define a location where the Access key and Secret access key will be stored. You can embed these keys in the source code, but we don’t recommend doing so, as it is not secure.
Another option is to store the keys in the .env file. You should never add this file to Git and should always use a new .env file for every environment. It’s also possible to use special managers for secret storage, such as AWS Systems Manager Parameter Store. This service provides secure encrypted storage of sensitive data.
Below is an example of working with the AWS Systems Manager Parameter Store, which you can use to integrate your application with different AWS accounts.
To create a Systems Manager Parameter Store client instance, you can use the Access key and Secret access key stored in the .env file. The user’s Access key and Secret access key to be stored in AWS SSM we can get, for example, from the site form:
const AWS = require('aws-sdk');

// Creating Systems Manager Parameter Store client instance
const ssm = new AWS.SSM({
	accessKeyId: AWS_ACCESS_KEY,
	secretAccessKey: SECRET_ACCESS_KEY,
	region: REGION
});

const dataValue = {
	accessKeyId: CUSTOMER_AWS_ACCESS_KEY
	secretAccessKey: CUSTOMER_AWS_SECRET_ACCESS_KEY
}

// Setting the parameter value
const params = {
  Name: 'example_parameter_name',
  Value: JSON.stringify(dataValue),
  Type: ‘SecureString’, // SecureString parameter encrypts Value
  Overwrite: true // Pointing to parameter rewriting if it exists
};

ssm.putParameter(params, (err, data) => {
  if (err) {
	console.log("Error setting parameter:", err);
  } else {
	console.log("Parameter set successfully:", data);
  }
});
Here is an example of reading data from the Systems Manager Parameter Store:
const AWS = require('aws-sdk');

// Creating the Systems Manager Parameter Store client instance
const ssm = new AWS.SSM({
	accessKeyId: OUR_APP_AWS_ACCESS_KEY,
	secretAccessKey: OUR_APP_AWS_SECRET_ACCESS_KEY,
	region: OUR_APP_REGION
});

// Getting the value of the encrypted parameter with automatic decryption
ssm.getParameter({Name: ‘example_parameter_name’, WithDecryption: true}, (err, data) => {
  if (err) {
	console.log("Error retrieving parameter:", err);
  } else {
	const parameterValue = data.Parameter.Value;
	console.log("Decrypted Parameter Value:", parameterValue);
  }
});
The examples above demonstrate how to integrate a Node.js application with AWS. Once the application is integrated, let’s take a look at practical examples of leveraging the integrated application to improve solution security.
Related project
Developing a Custom Secrets Management Desktop Application for Secure Password Sharing and Storage
Discover how Apriorit experts designed and implemented a custom secrets management application to satisfy a client’s demands.

Enabling the ability to scan user services for vulnerabilities
After migrating a Node.js application to the cloud, you can start using all the benefits of cloud service technologies. The example below shows how an application designed and integrated by Apriorit developers helped our client to enhance solution security.
The application allows us to scan the user’s services for critical infrastructure settings and search for potential vulnerabilities. The frequency of this scanning may vary, but it could be once a day.
In the example below, we demonstrate how scanning allows us to define that MFA devices are not deactivated in the AWS user account:
const AWS = require('aws-sdk');

class AWSConfig {

	constructor(accessKeyId, secretAccessKey) {
    	// Creating Systems Manager Parameter Store client instance
    	this.AWS_IAM = new AWS.IAM({
        	accessKeyId,
        	secretAccessKey
    	});
	}

	// Getting a list of the user’s MFA devices
	mfaDevicesList = async (userName) => {
    	const params = {
        	UserName: userName,
    	};
    	return this.AWS_IAM.listMFADevices(params).promise();
	};

	mfaDeviceIsNotDeactivated = async () => {
    	const response = [];
    	let responseObject = {};

    	// Getting a list of users
    	const usersList = this.AWS_IAM.listUsers().promise();

    	// Checking users and their MFA devices
    	for (const user of usersList.Users) {
        	const mfaDevices = await this.mfaDevicesList(user.UserName);
        	if (mfaDevices.MFADevices.length !== 0) {
            	for (const device of mfaDevices.MFADevices) {
 // If a user’s device is deactivated, we record this information to display in the scanning report
                	if (
                    	!device.EnableDate ||
                    	Number.isNaN(Date.parse(device.EnableDate))
                	) {
                    	responseObject = {
                        	user_name: user.UserName,
                        	device_serial_number: device.SerialNumber,
                    	};
                    	response.push(responseObject);
                	}
            	}
        	}
    	}

    	return {
        	status: ‘failed’,
        	response,
    	};
	}
}

// Creating AWSConfig instance with credentials transfer
const awsProvider = new AWSConfig(
	CUSTOMER_AWS_ACCESS_KEY,
	CUSTOMER_AWS_SECRET_ACCESS_KEY
);

// Calling a method to check MFA devices
const result = awsProvider.mfaDeviceIsNotDeactivated();
console.log(result);
The examples above demonstrate how to integrate one of the Node.js applications with AWS and how to use it to scan AWS services (EC2, RDS, S3, Lambda, and more) for potentially insecure configuration settings.
Azure integration for Node.js applications
To integrate an application with Azure service, your developers need to:
- Register on the Azure portal to create an Azure account.
- Register a new application in Microsoft Entra ID (formerly Azure Active Directory) and get the Application ID and Application Secret.
- Configure permissions for the application:
- Navigate to Microsoft Entra ID > App registrations, select a new application, then go to the API permissions.
- As a rule, for interaction with an API it’s enough to add at least one permission: User.Read.All. To do so, choose Add a permission, select Microsoft Graph > Application permissions, then select User.Read.All in the list.
- Install Azure SDK and dependencies to work with Azure in the project. For Node.js, you can use the @azure/core package or other Azure-specific packages.
For application integration with Azure cloud, besides the Application ID and Application Secret, the developers need to get a Tenant ID as well.
Now, let’s take a look at one practical example of how to leverage an integrated application to enhance the solution’s security.
Enabling the ability to check Azure policies
In the following example, we demonstrate how to determine that only Azure administrators can add guest users.
Installing the required npm-packages:
npm install @azure/identity @microsoft/microsoft-graph-client

// Connecting the authentication module
const {
	ClientSecretCredential
} = require('@azure/identity');

// Connecting the authentication provider for Microsoft Graph API
const {
	TokenCredentialAuthenticationProvider,
} = require('@microsoft/microsoft-graph-client/authProviders/azureTokenCredentials');

// Connecting the client for work with Microsoft Graph API
const {
	Client
} = require('@microsoft/microsoft-graph-client');

class AzureController {
	constructor(tenantID, clientID, secretValue) {
    	this.authClient = null;
    	this.allowInviteGuests = ['everyone', 'adminsGuestInvitersAndAllMembers'];
    	this.auth(tenantID, clientID, secretValue);
	}

	// Authentication method via credentials and Graph API client initialization
	auth = (tenantID, clientID, secretValue) => {
    	// Creating a ClientSecretCredential instance for authentication
    	const clientSecretCredential = new ClientSecretCredential(
        	tenantID,
        	clientID,
        	secretValue
    	);

    	const authProvider = new TokenCredentialAuthenticationProvider(
        	clientSecretCredential, {
            	scopes: ['.default'], // Setting the authorization scope
        	}
    	);

    	// Initializing a client for interaction with Microsoft Graph API leveraging the authentication provider
    	this.authClient = Client.initWithMiddleware({
        	debugLogging: true,
        	authProvider,
    	});
	};

	// Method for checking the onlyAdministratorsCanInviteGuests permission
	onlyAdministratorsCanInviteGuests = async () => {
    	// Getting the authorization policy from Microsoft Graph API
    	const policy = await this.authClient
        	.api('/policies/authorizationPolicy')
        	.get();

    	const {
        	allowInvitesFrom
    	} = policy;

    	if (this.allowInviteGuests.includes(allowInvitesFrom)) {
        	// Returning result: 'Non-administrator members are able to invite guest users to AD' and 'failed' status
        	return {
            	status: 'failed',
            	result: 'Non-administrator members be able to invite guest users to AD',
        	};
    	}

    	// Returning result: 'Only administrator members can invite guest users to AD' and 'success' status
        	return {
            	status: 'success',
            	result: 'Only administrator members be able to invite guest users to AD',
        	};
	};
}

// Creating an AzureController instance
const azureProvider = new AzureController(TENANT_ID, CLIENT_ID, SECRET_VALUE);

// Calling a method for checking the onlyAdministratorsCanInviteGuests permission
const result = azureProvider.onlyAdministratorsCanInviteGuests();
console.log(result); // Output of result to the command-line
This is just one example of how to use Azure SDK to work with Azure policies. Besides this, the SDK allows for working with such tools as Cosmos DB, data stores, virtual machines, and backups.
Related project
Cloud Application Security Best Practices: Data Safety and IT Compliance Challenges
Enhance your solution’s protection! Explore cloud data protection best practices from Apriorit specialists.

GCP integration for Node.js applications
To integrate a Node.js application with Google Cloud Platform, your developers first need to create an organization administrator via Google Cloud Identity or Google Workspace.
Here’s how to do it:
- Sign in to the Google Cloud console with a personal account.
- Navigate to Google Cloud Setup.
- Follow the instructions and create an administrator account.
- Add a DNS record to verify your domain in order to link your organization’s domain to that account.
After domain verification, the organization is created automatically.
Developers can then proceed to the next integration steps:
- In the GCP console, go to the Projects menu and choose Create project.
- Specify the project name and ID, and choose Create to create a project.
- Once the project is created, navigate to the APIs and services page in the GCP console.
- Select the required type of API (for example, Cloud Functions API) and select Enable to enable the API for the project.
- In the GCP console, go to the IAM & Admin page, select Service Accounts, and choose Create service account. Once the service account is created, copy its email address.
- Grant roles. You can do this in two ways:
- Grant roles directly to the service account: In this case, you will get access to the resources within your service account only.
- Inherit roles: In this case, you will get access to all account resources.
The second way is preferable, but the choice depends on the application requirements.
- To inherit roles, in the GCP console, select your organization in the menu in the upper left corner.
- Select IAM in the menu, choose Grant access, and paste the copied email address to the Add principals field.
- Select the required roles in the list (for example, Browser).
- In the GCP console, navigate to the IAM & Admin page and select your service account to create a key for it.
- In the Keys tab, create a new key.
- Once the key is created, download the JSON file with information on the key.
Now, let’s proceed to a practical example of how to leverage the integrated application to check the Cloud Storage bucket policy.
Enabling the ability to check the bucket policy
After integration, developers can work with GCP Cloud Storage via Google Cloud SDK. The example below demonstrates how to check that cloud storage buckets are not anonymously or publicly accessible.
Install npm-package:
npm install google-auth-library

const { JWT } = require('google-auth-library');

class GCPController {
	constructor(clientEmail, privateKey) {
    	this.auth(clientEmail, privateKey);
	}

	// Authentication function initializes a client for work with GCP
	auth(clientEmail, privateKey) {
    	this.client = new JWT({
        	email: clientEmail,
        	key: privateKey,
        	scopes: [
            	'https://www.googleapis.com/auth/cloudplatformorganizations.readonly',
        	],
    	});
	}

	// Getting the bucket policies
	getIAMPolicyBucket = async (bucketName) => {
    	const url = `https://storage.googleapis.com/storage/v1/b/${bucketName}/iam`;
    	const result = await this.client.request({
        	url
    	});
    	return result.data;
	};

	// Getting the GCP project list
	gcpGetProjectsList = async () => {
    	const url = 'https://cloudresourcemanager.googleapis.com/v1/projects';
    	const filter = 'lifecycleState:ACTIVE';
    	const result = await this.client.request({
        	url,
        	params: {
            	filter
        	}
    	});
    	return result.data?.projects;
	};

	// Getting a list of buckets for the specific project
	getBuckets = async (projectId) => {
    	const url = `https://storage.googleapis.com/storage/v1/b?project=${projectId}`;
    	const result = await this.client.request({
        	url
    	});
    	return result.data?.items || [];
	};

	// Checking the bucket access restriction
	getRestrictedPrincipals = async (bucketName) => {
    	const policyBucket = await this.getIAMPolicyBucket(bucketName);
    	const restrictedPrincipals = ['allUsers', 'allAuthenticatedUsers'];
    	return policyBucket.bindings.some((item) =>
        	restrictedPrincipals.some((principal) => item.members.includes(principal))
    	);
	};

	// Checking the Cloud Storage bucket accessibility
	checkCloudStorageBucketsAccessibility = async () => {
    	const result = [];
    	const projects = await this.gcpGetProjectsList();

    	if (projects && projects.length > 0) {
        	for (const project of projects) {
            	const buckets = await this.getBuckets(project.projectId);
            	for (const bucket of buckets) {
                	const principals = await this.getRestrictedPrincipals(bucket.name);

                	if (principals) {
                    	result.push({
                        	bucketName: bucket.name
                    	});
                	}
            	}
        	}
    	}
    	return result;
	};
}

// Creating a GCPController instance
const gcpProvider = new GCPController(CLIENT_EMAIL, PRIVATE_KEY);

// Checking Cloud Storage bucket accessibility
const result = gcpProvider.checkCloudStorageBucketsAccessibility();
console.log(result); // Output of the check results
This allows you to interact with other GCP components, such as Compute Engine, BigQuery, and Cloud Functions.
Now, with a Node.js application integrated with GCP and the ability to check bucket policies, your team can explore more features to ensure better solution security in the cloud.
Conclusion
Integrating Node.js applications into cloud platforms provides businesses with a range of benefits including better scalability, security, performance, and cost-efficiency of their solutions.
This article contains real-life examples of Node.js application integration with cloud services of three leading providers: Amazon, Microsoft, and Google. The examples demonstrate how to integrate an application and how to leverage it to enhance solution security, including scanning for vulnerabilities and checking policies.
Over the past 20+ years, Apriorit has delivered numerous web and cloud projects, protecting them with strong cybersecurity measures. Our experts are ready to help you develop efficient Node.js applications and integrate them with cloud services. Consider entrusting your projects to Apriorit to ensure smooth application operation in compliance with cybersecurity best practices.
Looking for experienced Node.js developers?
Get expert assistance in Node.js application development and secure integrations with cloud services by collaborating with Apriorit’s expert teams.