This article is intended to provide full and detailed description of deployment of automated testing system consisting of Team Foundation Server + Microsoft Test Manager + System Center Virtual Machine Manager.
This article may be useful for Automated Testing Specialists and System Administrators.
Introduction
Here is the general scheme of testing:
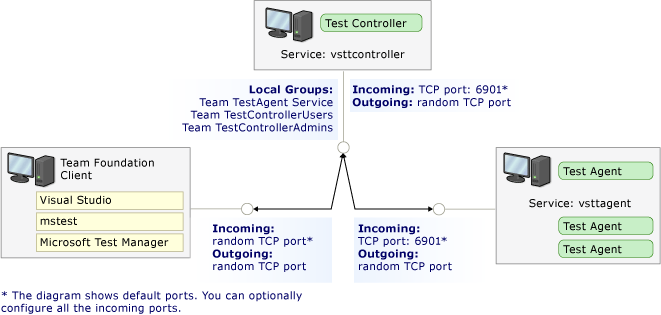
General System Scheme
There is a physical server managed by Windows Server 2008 R2 x64. There is a Hyper-V role set on it. There is also a virtual internal network created in Hyper-V manager, where all virtual machines depicted on the scheme are hosted. As this is an internal network, physical server also has virtual network interface that enters this subnetwork. Moreover, physical server is the domain controller of this virtual subnetwork. All virtual machines belong to this domain. To get access to the advanced virtual machine management features, we will later install SCVMM Server on physical server. To make it easier to configure our system, we turn off UAC and Firewall on physical server.
As on the scheme, we need such virtual machines:
- TFS Server. It is a virtual machine managed by Windows Server 2008 R2 x64. There will be Test Controller installed on it without any specific requirements, and TFS will be also installed, which has high requirements as for performance. Besides, we need significant disk space as we are going to store all autotests code.
- TFS Client. It is a virtual machine managed by Windows 7 x64. Visual Studio 2010 and Microsoft Test Manager are installed on it. Here we can develop and debug tests and also manage the whole testing system, start tests, browse their results.
- Test Agent. It is a virtual machine where tests will be performed. In particular in our system there 10 of them: from Windows XP up to Windows7 including server platforms and x64 systems. There will be a Test Agent, Lab Agent and Build Service installed on each of them, but basically requirements to virtual machine concern only OS and tested product requirements.
1. TFS Server Configuration
On TFS SERVER
- Clean Windows Server 2008 R2 is installed
- UAC and Firewall are turned off.
1.1 Installing SQL Server 2008 R2
Full correct installation is shown in the video: http://elhajj.wordpress.com/2011/03/02/how-to-install-sql-server-2008-for-tfs-2010/
If the link to the video is invalid do the following:
- Start SQL installation
- Select new installation or add features to an existing installation
- Setup Support Files page – Click Ok.
- Product Key page – Click Next
- License Terms – Select the I have read and accept the license terms and click Next
- Setup Support Files – click Install, then click Next
- Setup Role Page – select the SQL Server feature installation.
- Feature selection page:
Check only:
For TFS:
- Database Engine Services
- Full-Text Search
For reporting:
- Analysis Services
- Reporting Services
Not required for TFS but useful for connection and database checking:
- Management Tools Basic
- Management Tools Complete
DO NOT CHECK:
- Client Tools Connectivity.
Click Next
- Installation Rules page – click Next
- Instance Configuration page – click Next
- Disk Space Requirements page – click Next
- Server Configuration page:
- Click Use the same account for all SQL Server services
- Account name: NT AUTHORITYNETWORK SERVICE
- Do not enter any password
- Click Ok
- For SQL Server Agent and SQL Server Browser Services set the Startup Type – Automatic.
- Click Next
- Database Engine Configuration page:
- Select Mixed Mode radio button
- Set and confirm the Password for sa user
- Click the Add current user button.
- Click Next
- Analysis Services Configuration page
- Click the Add Current User button
- Click Next
- Reporting Services Configuration page
- Remain the Install the native mode default configuration radio button selected.
- Click Next
- Error Reporting page – click Next.
- Installation Configuration Rules page – click Next.
- Ready to Install page – click Install
Finish.
1.2 Install IIS.
- Open the Start -> Administrative Tools -> Server Manager
- Right Click the Roles -> Select the Add Roles item
- Before You Begin page – click Next
- Server Roles page – check the Web Server (IIS) and then click Next
- Web Server (IIS) page – click Next
- Role Services page – check All options and click Next
- Confirmation page – click Install
Close.
1.3 Install TFS Server.
The manual is supplied with the installation files. You can read about TFS installation there: TFSInstall.chm
Or you can download it here: http://www.microsoft.com/download/en/details.aspx?displaylang=en&id=24337
Also there is useful video here: http://msdn.microsoft.com/en-us/vstudio/video/gg537701
Step-by step installation instruction:
- Start Setup.exe
- Welcome Screen – click Next
- Accept License Agreement – Select the I have read and accept the license terms and click Next
- Select Features to Install – check All options – click Install
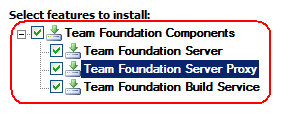
Features to install
- TFS asks for restart – click Restart Now.
- When installation is Finished click Configure.
1.4 Configuring TFS Server
*Optional: If you have closed TFS Setup wizard: Open Start -> All Programs -> Microsoft Team Foundation Server 2010 -> Team Foundation Administration Console.
- Click the Application Tier and then Click the Configure installed Features.
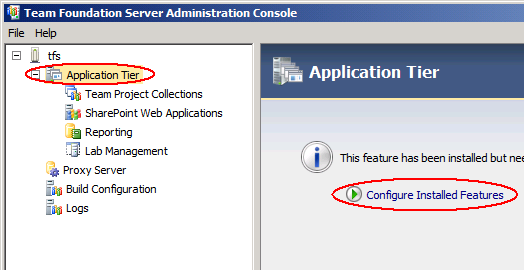
Start configuring Application Tier
- Remain Standard Single Server selected and click Start Wizard
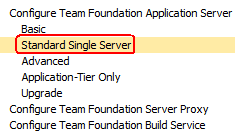
Standard Single server Start Wizard
- Welcome page – click Next
- Service Account page:
- Specify Account name and password for access to MS SQL Server which installation was described above.
- Click Test
- If the test is successful click Next.

Specify account
- Review page – click Next.
- Readiness Check page:
- Firewall and SharePoint are not important for us now, don’t worry about the warning. Click Configure
- Configure page – click Next.
- After installation completes click Close.
- Application Tier configuring is finished.
- Select the Configure Team Foundation Server Proxy and click Start Wizard.
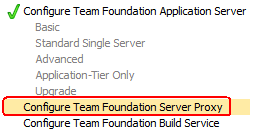
Configuring proxy start wizard
- Welcome page – click Next
- Service Account page – click Next
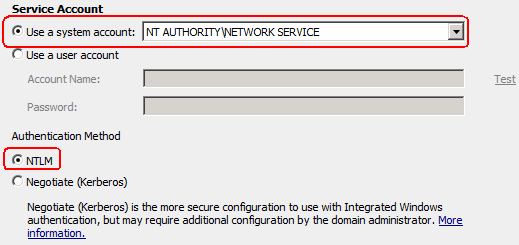
Service account
- Proxy Details page – click Next

Proxy details
- Review page – click Next
- Readiness Check page – click Configure
- Configure page – click Next
- Complete page – click Close
- The Proxy configuration is finished
- Select the Configure Team Foundation Build Service and click Start Wizard.

Start build service configuration
- Welcome page – click Next
- Project Collection page – click Next
- Build Services page – click Next
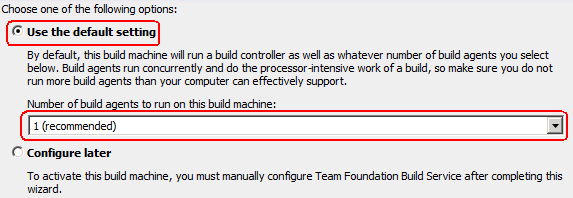
Build Services
- Settings page – click Next
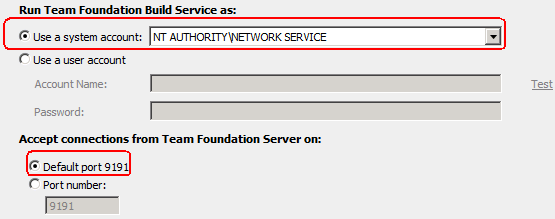
Settings
- Review page – click Next
- Readiness Check page – click Configure
- Configure page – click Next
- Complete page – click Close
- Build Service Configuring is finished.
- Click Close.
- Now you may close the Team Foundation Server Administrative Console.
On the TFS Server:
1.5 Install Test Controller
- Run setup.exe
- Welcome page – click Next
- License Agreement page – select the I have read and accept the license terms and click Next
- Select Features to Install page – Remain the Microsoft Visual Studio Test Controller option checked and click Install.

TC Select features to install
- Installation is finished. Click Configure.
1.6 Configure Test Controller
- * Optional: Click Start -> All Programs -> Microsoft Visual Studio 2010 -> Microsoft Visual Studio Test Controller 2010 Configuration Tool
- Remain Network Service Account selected
- Check the Register with Team Project Collection option
- Enter the TFS link. The link that was created previously is http://tfs:8080/tfs/defaultcollection
- We will not execute load tests, that’s why it remains unchecked. We can reconfigure Test Controller later if any.
- Click Apply Settings.
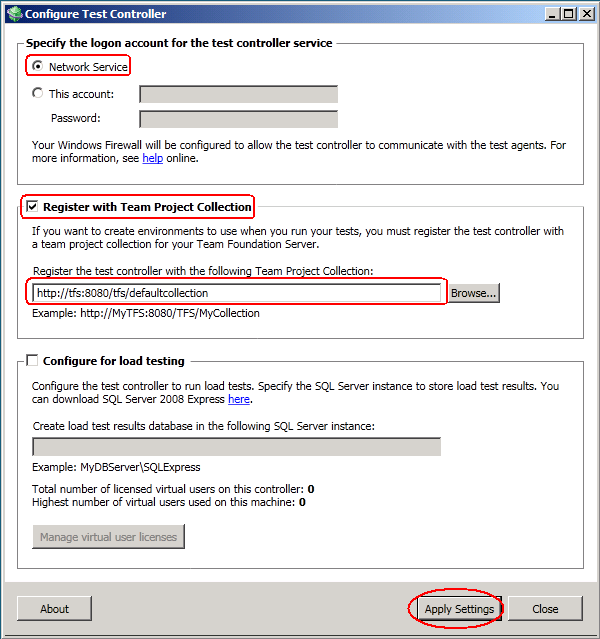
TC Configuration Settings
- Close all windows of Test Controller Configuration Tool.
1.7 Install MS Visual Studio 2010 Ultimate
- Start setup.exe
- Click Install Microsoft Visual Studio 2010
- Welcome page – click Next
- License Agreement page – select the I have read and accept the license terms and click Next
- Select Features to Install page :
- Select Custom
- click Next
- Select Features to Install next page:
Check:
- Microsoft Visual Studio 2010 Ultimate (and sub-nodes)
Uncheck:
- Microsoft Office Developer Tools (x64)
- Dotfuscator Software Services Community Eddition
- Microsoft SQL Server 2008 Express Service Pack 1 (x64)
- Microsoft Share Point Developer Tools.
Click Install
- When installation asks for restart click Restart Now
- After restart and log in the installation continues.
- When installation finishes click Finish.
1.8 Create Test Project
1.8.1 Create new team foundation project
- Open Start -> All Programs -> Microsoft Visual Studio 2010 -> Microsoft Visual Studio 2010
- Click Connect to Team Foundation Server
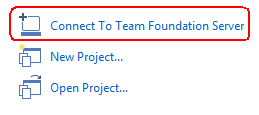
Connect to tfs
- Click the Servers button.
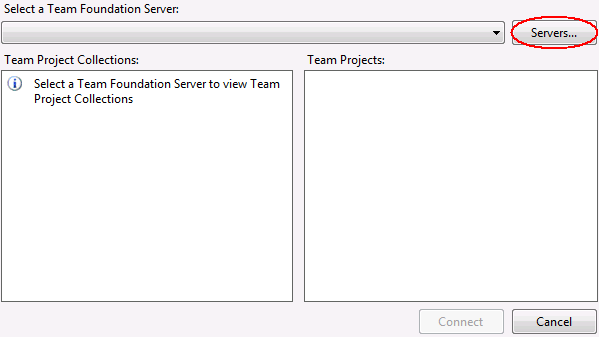
Connect to tfs server list
- Click the Add… button

Add tfs server
- Enter the Team Foundation Server link: http://tfs:8080/tfs and click Ok.
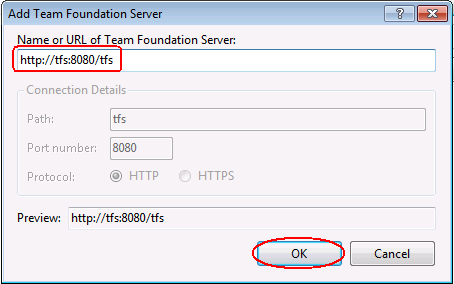
Enter TFS server link
- TFS server is added to the list. Click Close.

TFS server is added
- TFS Server is added to the drop-down list. DefaultCollection is displayed in the list of Team Project Collection.
- Select the Default Collection and click Connect.
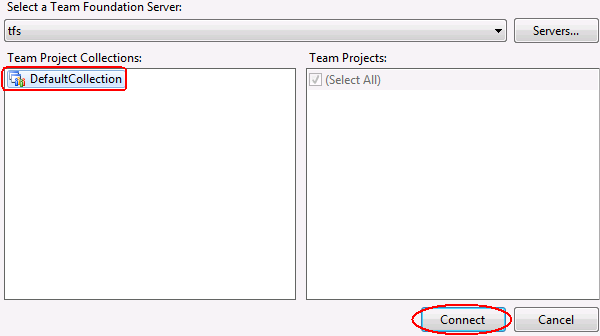
TFS server is added to drop-down list
- Team Explorer viewer opens.
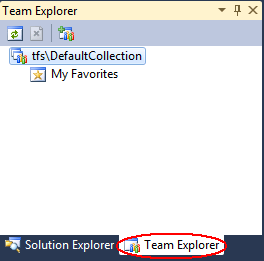
Team Explorer
- Right Click the tfsDefaultCollection node
- Select the New Team Project… menu item.
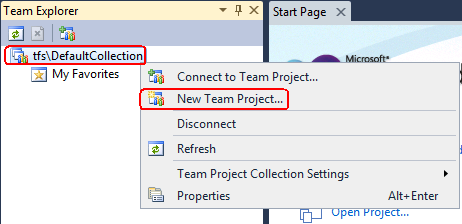
New team project
- Specify the name of the Team Project and click Next.

Team project name
- Select the MSF for Agile Software Development v5.0 process template and click Finish.
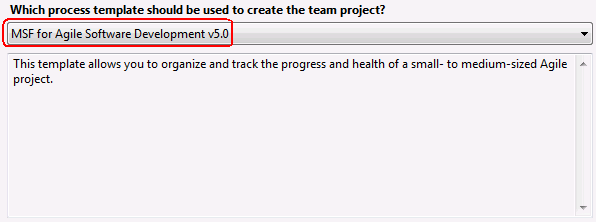
Process template
- When Team Project creation process is finished, uncheck the Launch the process guidance for more information about running the team project and click Close.
- On Welcome page Click the New Project…
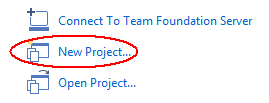
Create new project locally
- Create new project with such settings:
- Select Visual C# -> Test
- Check the Add to Source Control option
- Remain all other settings default.
- Click Ok.
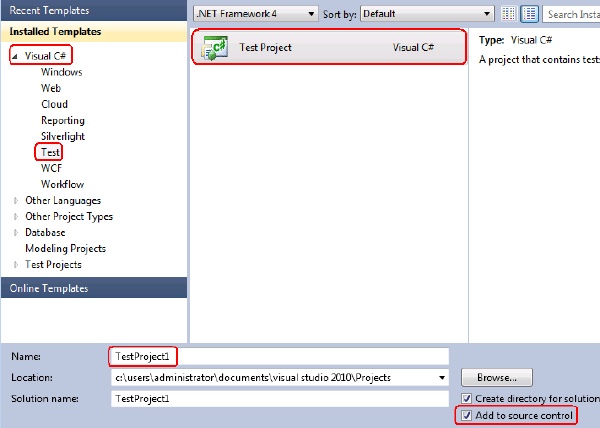
Create new project settings
- The Add Solution to Source Control form appears. Remain all settings default and click Ok.
- The Project is added to the Source Control.
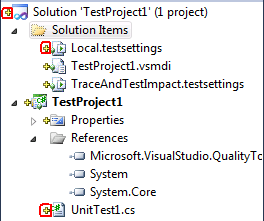
Project is added to source control
1.8.2 Record Coded UI test
- Let’s create an UI test
- In the Solution Explorer, right Click the Project1 node and select Add -> Coded UI Test…
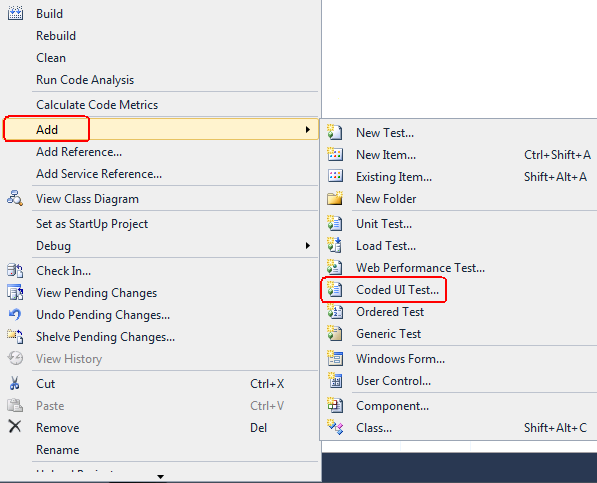
Add coded ui test
- Remain the Record actions, edit UI map or add assertions selected. Click Ok.
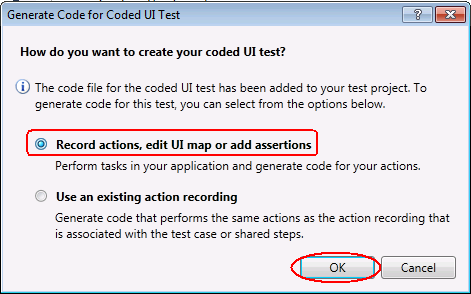
Generate coded UI test
- The recorder appears. Click the Start Recording button.

Recorder
- Recording starts. The button icon was changed.

Recording starts
- Click Start -> Computer
- Open C:Users
- Right click and select the New -> Folder in context menu.
- Enter name “1”
- Press Enter
- Click the Pause Recording button of the Test Recorder.
- Click the Generate Code button.

Click Generate Code
- Remain the method name default and click the Add and Generate button.
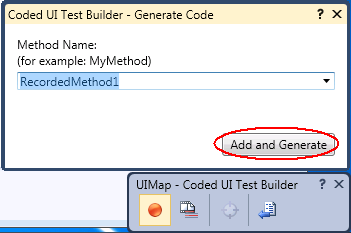
Test method Add and Generate
- Code is generated.
- Right click the Solution node and select Check In… item in the context menu.
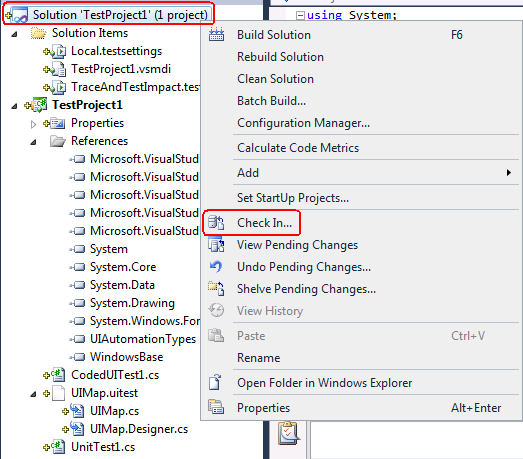
Check In
- Enter any comment to the Comment text box and click the Check In button
- The items in the Solution Explorer viewer are displayed as Checked in.
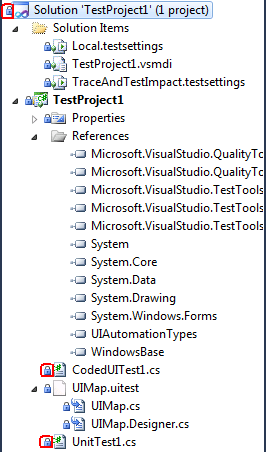
Checked in
1.8.3 Create a build definition and build the project
- Let’s build the project.
- Open the Team Explorer viewer
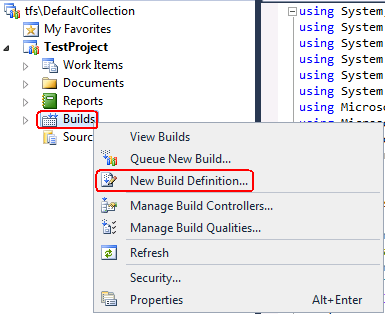
- Right click the Builds node and select the New Build Definition… item in the context menu.
New builds definition
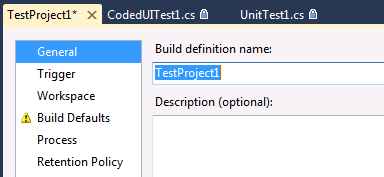
- On the General page, remain the default Build Definition name.
Build definition
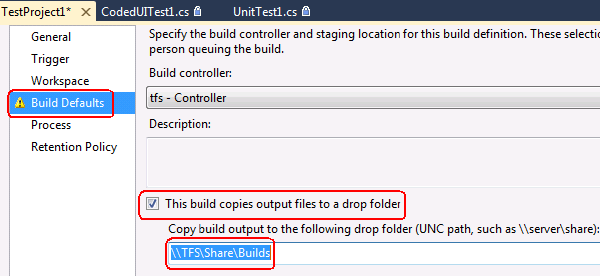
- Open the Build Defaults page.
- Remain Build Controller default.
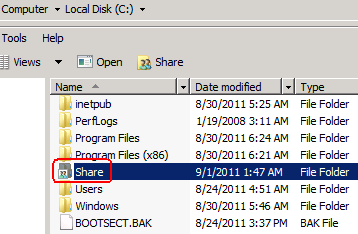
- On the TFS Server machine, create a folder for Builds output and share it. For example C:ShareBuilds
Shared folder for build output
- On to the computer with Visual Studio, enter the path to the build output to the text box: TFSShareBuilds
Enter build output path
- Open the Process page
- Expand the Advanced node.
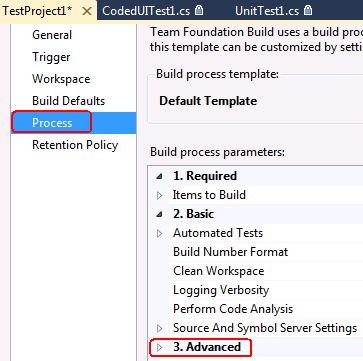
Build process
- Set the Disable Tests value – True.

Disable tests
- Save the project (click the save All button on VS toolbar).
- The build definition is saved.
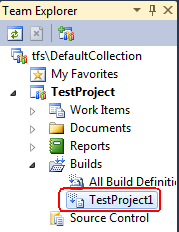
Build definition saved
- Let’s build the test.
- Right click the Project1 build definition and select the Queue New Build… context menu item.
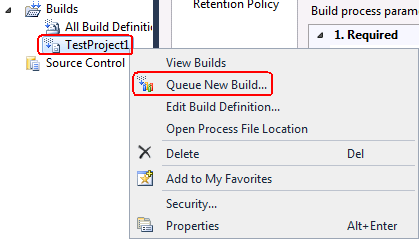
Queue new build item
- On the Queue Build “TestProject” remain all settings default and click Queue.
- Build is started.

Build is started
- The build is finished successfully.

Build is finished successfully
On AGENT:
Before installing test agent:
ATTENTION!!! TURN OFF the IPv6 PROTOCOL on agent. If IPv6 protocol is turned on, it is used by default, but Test Agent does not support IPv6 connection.
ATTENTION: If you install Test Agent on WinXPx64 or Server2003 x64/x86, you should additionally install
- the Windows Imaging Component (http://www.microsoft.com/download/en/details.aspx?id=32 for x86)
- MSXML 6.0 http://www.microsoft.com/download/en/details.aspx?displaylang=en&id=6276
1.9 Test Agent installation
- Installing Visual Studio Agent 2010. Start setup.exe
- Welcome page – click Next
- License Agreement page – select the I have read and accept the license terms and click Next
- Select Features to Install – Remain the Microsoft Visual Studio Test Agent 2010 selected and click Install.

Features to install
ATTENTION!!! For Win7 x64, Vista x64 and Server 2008 x64, select also the Performance Tool option. Otherwise the error will appear when configuring Test Agent.
See details here: http://social.msdn.microsoft.com/Forums/en-US/vststest/thread/b4f4951c-5faa-4553-bcc1-0c0ad3867e72
- When installation is finished, click Configure.
1.10 Test Agent configuration
- *Optional: Open Start -> All Programs -> Microsoft Visual Studio 2010 -> Microsoft Visual Studio 2010 Test Agent Configuration Tool.
- Select Run the test agent as Interactive Process. It is required for desktop application testing. Click Next.

Run agent as process
- On the next page, select such settings:
- Enter the login and password of the current computer admin user to start agent as interactive process.
- Check option Log on automatically.
- Check option Ensure screen saver is disabled.
- Check the Register with Test Controller option
- In the text box, specify the test controller name and port tfs:6901 (this port is default for test controller). The test controller installation was described above.
- Click Apply Settings.
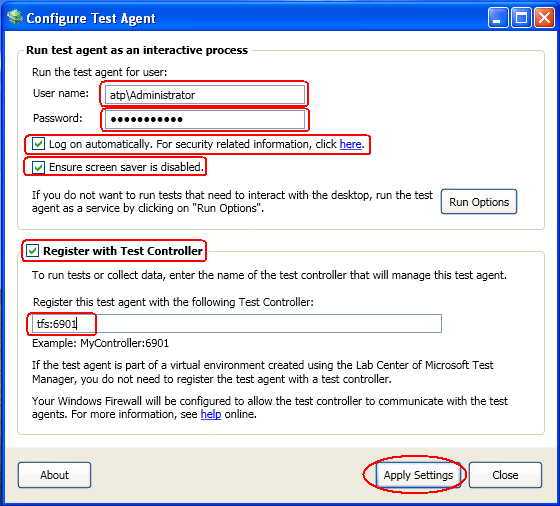
Configure test agent
- Configuration is finished successfully. Agent icon appears in the tray.
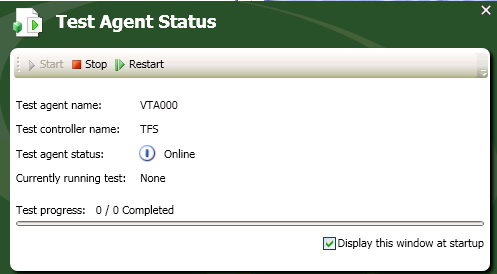
Configuration is finished
TROUBLESHOOTING: If you get an error: “Failed to open the Visual Studio v10.0 registry key. Ensure that test agent is installed, the config utility has the required permissions to access and modify the registry” Do the following:
- Start setup.exe again
- Select the Add/remove features.
- Check the Performance Tool option.
- Complete the installation.
See details here: http://social.msdn.microsoft.com/Forums/en-US/vststest/thread/b4f4951c-5faa-4553-bcc1-0c0ad3867e72
- You may close all configuration forms.
1.11 Creating Test Plan, Test Cases and Test Environment
- On the computer where Visual Studio is installed, open Start -> All Programs -> Microsoft Visual Studio 2010 -> Microsoft Test Manager 2010
- Expand the tfs -> DefaultCollection and select the TestProject. Click Connect Now.
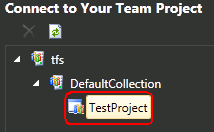
TM Connect to TFS
- Test Manager requires Test plan. Let’s create it. Click the Add button.

Click add
- Enter test plan name, for example TestPlanForTestProject. Click Add.
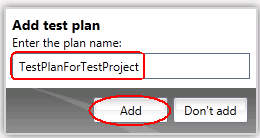
Enter test plan name
- Test Plan is created and selected. Click Select Plan.
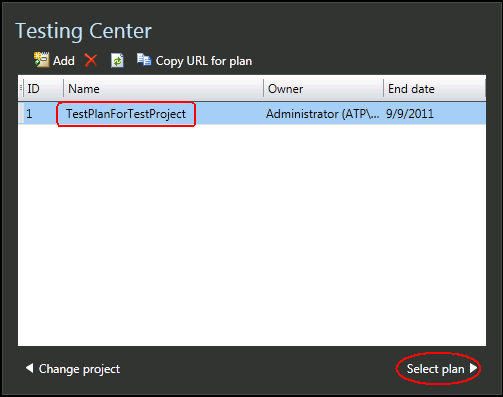
Test plan is selected
- TestPlan is opened in the Test Manager.
- Let’s add a test case. Click the New button.
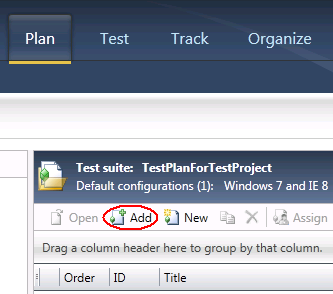
Test manager opens
- Enter the test case name – “Create a folder”
- To add a step, click the cell in the Action column and enter steps, then add expected result. Click the Save and Close button.
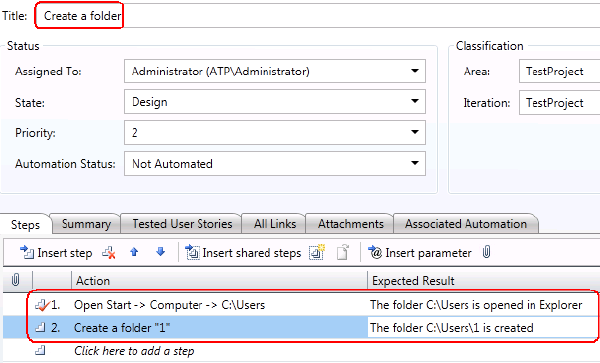
Test case is created
- Click the Testing Center and select Lab Center from drop-down list.
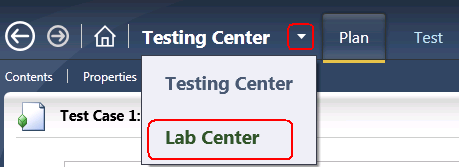
Lab center
- On the Environments form, click the New button and select New Physical Environment from the drop-down list.
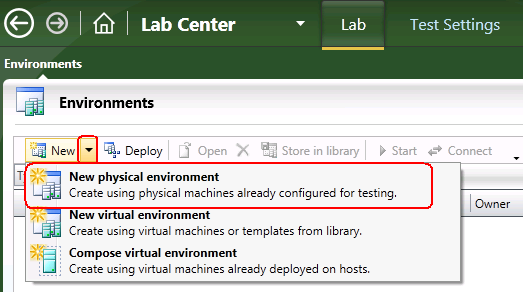
Environments form
- On the Name and location page, enter the name of the environment – “Win7”. Click Next.
- On the Machines page, select the agent name in the Available machines list and click Add to environment. The machine with test agent must be present in the list, if the test agent is online.
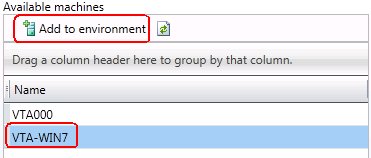
Select test agent
- The agent was moved to the Selected machines list.
- To assign a role – click it and select the Desktop Client from the drop-down list.
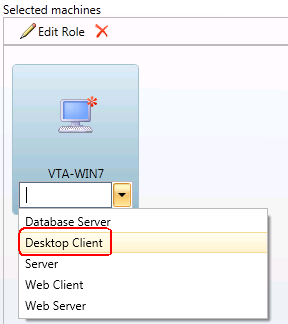
Select role
- Click Finish. The environment is created.
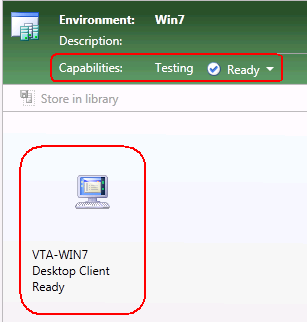
Environment is created
- Return to the Testing Center (clicking Lab Center)
- Select the “TestPlanForTestProject” test plan. Click Properties.
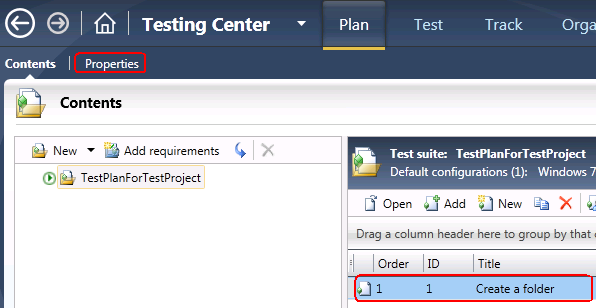
Test case properties
- In Automated Runs, select the Win7 environment from the list.
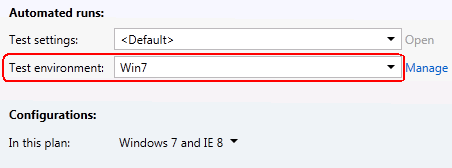
Assign test environment to test plan
- In the Builds -> Build in use click the Modify link.

Assign test environment to test plan
- Click Save Plan and Select Build.
- The latest TFS build is selected in the Available builds combo box. Click the Assign to plan button.

Assign build to plan

Build is assigned
- Close the Assign Build form.
- Open the Microsoft Visual Studio.
- Open the Solution Explorer and build the project locally (Build -> Build Solution).

Build solution
- Solution is built
- Let’s associate test case with UI Test method. (you can find additional information here: http://msdn.microsoft.com/en-us/library/dd380741.aspx)
- Open the Team Explorer -> Test Project -> Work Items -> Team Queries -> My Test Cases. Double click My Test Cases, and the Create a folder test case appears in the viewer.
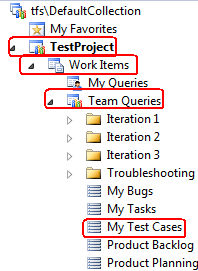
Open test case
- Open the Associated Automation tab. And click the … button.
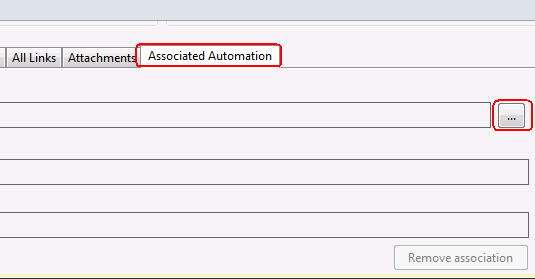
Associated automation
- Select the CodedUITestMethod1 and click Ok.

Methods
- Test method is assigned.
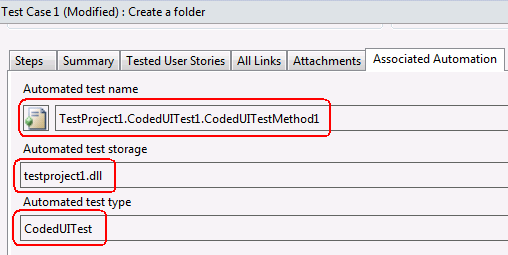
Method is associated with test case
- Click the Save All button.
- Open Test Manager
- Click the Test item in main menu.
- Select the Create a folder test case and click Run.

Click run
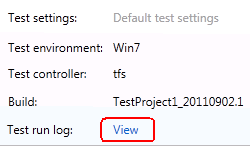
- Test Run form opens.
- Click the View link in the Test run log.
Test run
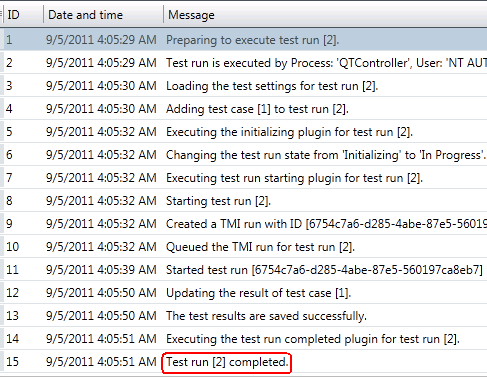
- Log appears. The last record says that test run is completed.
- Close test run log.
Test run log
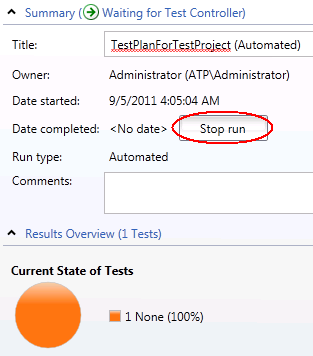
- Click the Stop run button.
Test run stop button
- Confirm stopping.
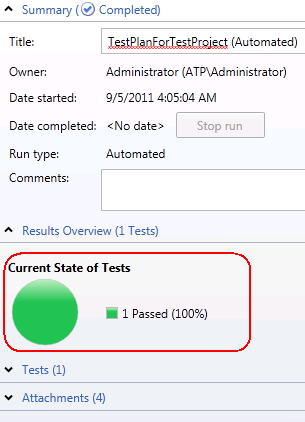
- The test is passed.
Test is passed
- Look at the test agent computer. The folder C:Users is opened and the “1” folder is present there.
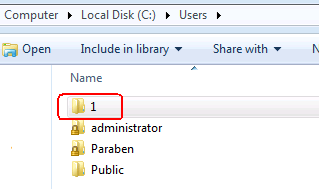
Test agent
1.12 Alternative way to assign test cases to test methods.
Exporting test cases from UI Test Methods.
Look for details: http://msdn.microsoft.com/en-us/library/dd465191.aspx
Instead of creating test case and then associating it with test assembly, you can create a test case from the test assembly.
- Open the Visual Studio command prompt: Start -> Microsoft Visual Studio 2010 -> Microsoft Visual Studio Tools -> Visual Studio Command Prompt 2010.
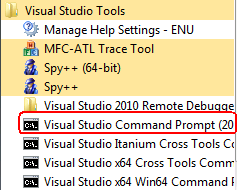
MS VS command prompt
- Change directory to the folder that contains the assembly:
cd C:Usersadministratordocumentsvisual studio 2010ProjectsTestProject1TestProject1binDebug

Chage folder
- Import all the test method to test cases:
tcm tescase /collection:http://tfs:8080/tfs/DefaultCollection /teamproject:TestProject /import /storage:TestProject1.dll
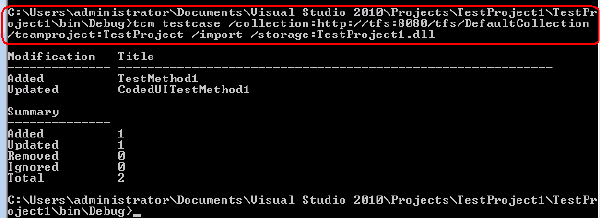
Imported tests
- Open the Team Explorer -> Test Project -> Work Items -> Team Queries -> My Test Cases. Double Click My Test Cases.
- There are test cases, which names correspond to the test methods names.
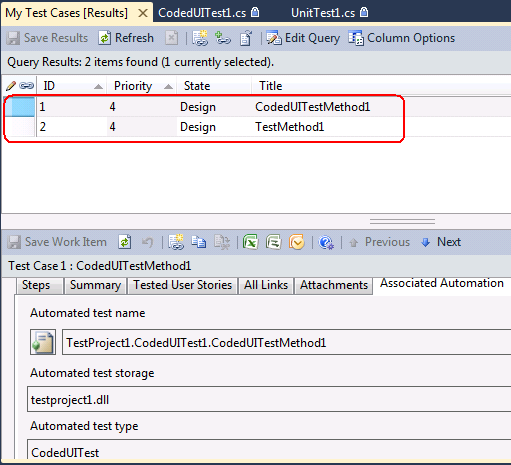
My test cases
The system we deployed and configured, allows to create and execute Unit Tests and Coded UI tests on the remote virtual machines. But still you need to start virtual machines and tests manually. To configure automated test run, we must install and configure SCVMM Server. Read about it in our next article!
Learn more software QA tips from the artcile describing software impact testing.


